Loading...
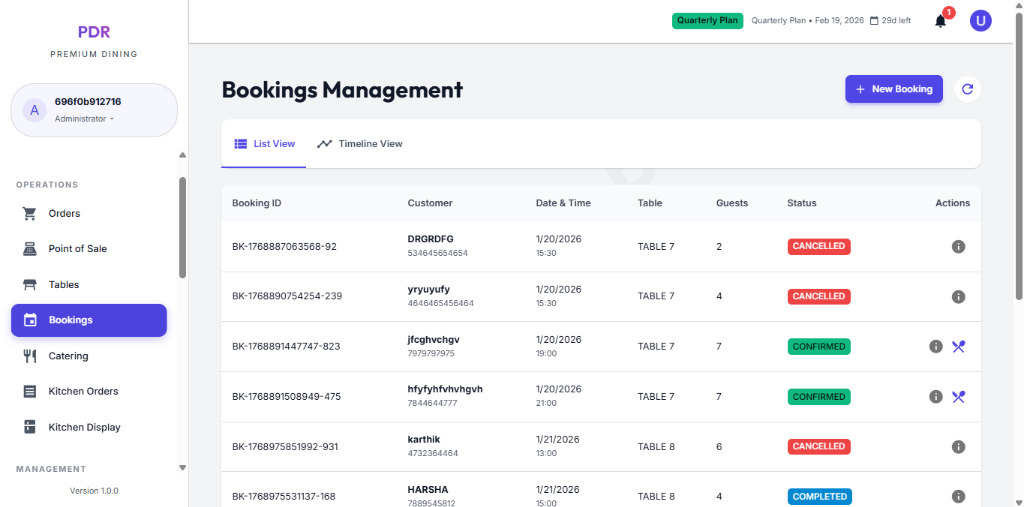
Bookings Management
Streamline your reservation flow and optimize seating arrangements.
📅 Reservations Overview
The Bookings screen provides a centralized view of all guest reservations. Use this module to track upcoming visits, manage guest lists, and handle cancellations.
List View Layout
The default tabular view organizes essential data columns:
- Booking ID: Unique reference for the reservation.
- Customer: Displays the guest's name and contact number.
- Date & Time: The scheduled arrival slot (e.g., 1/20/2026 19:00).
- Table & Guests: The assigned table (e.g., TABLE 7) and party size.
Status Indicators
Color-coded badges provide instant status visibility:
- CANCELLED The reservation has been voided.
- CONFIRMED The booking is active and confirmed.
- COMPLETED The dining session is finished.
Actions & Controls
Perform key tasks directly from the dashboard:
- + New Booking: (Top Right) Open the form to create a new reservation.
- ℹ️ Details: (Info Icon) View the full reservation summary.
- View Toggle: Switch between List View and Timeline View.
➕ Creating a New Booking
Manually add a reservation by clicking the "+ New Booking" button. A simplified modal allows you to quickly check availability:
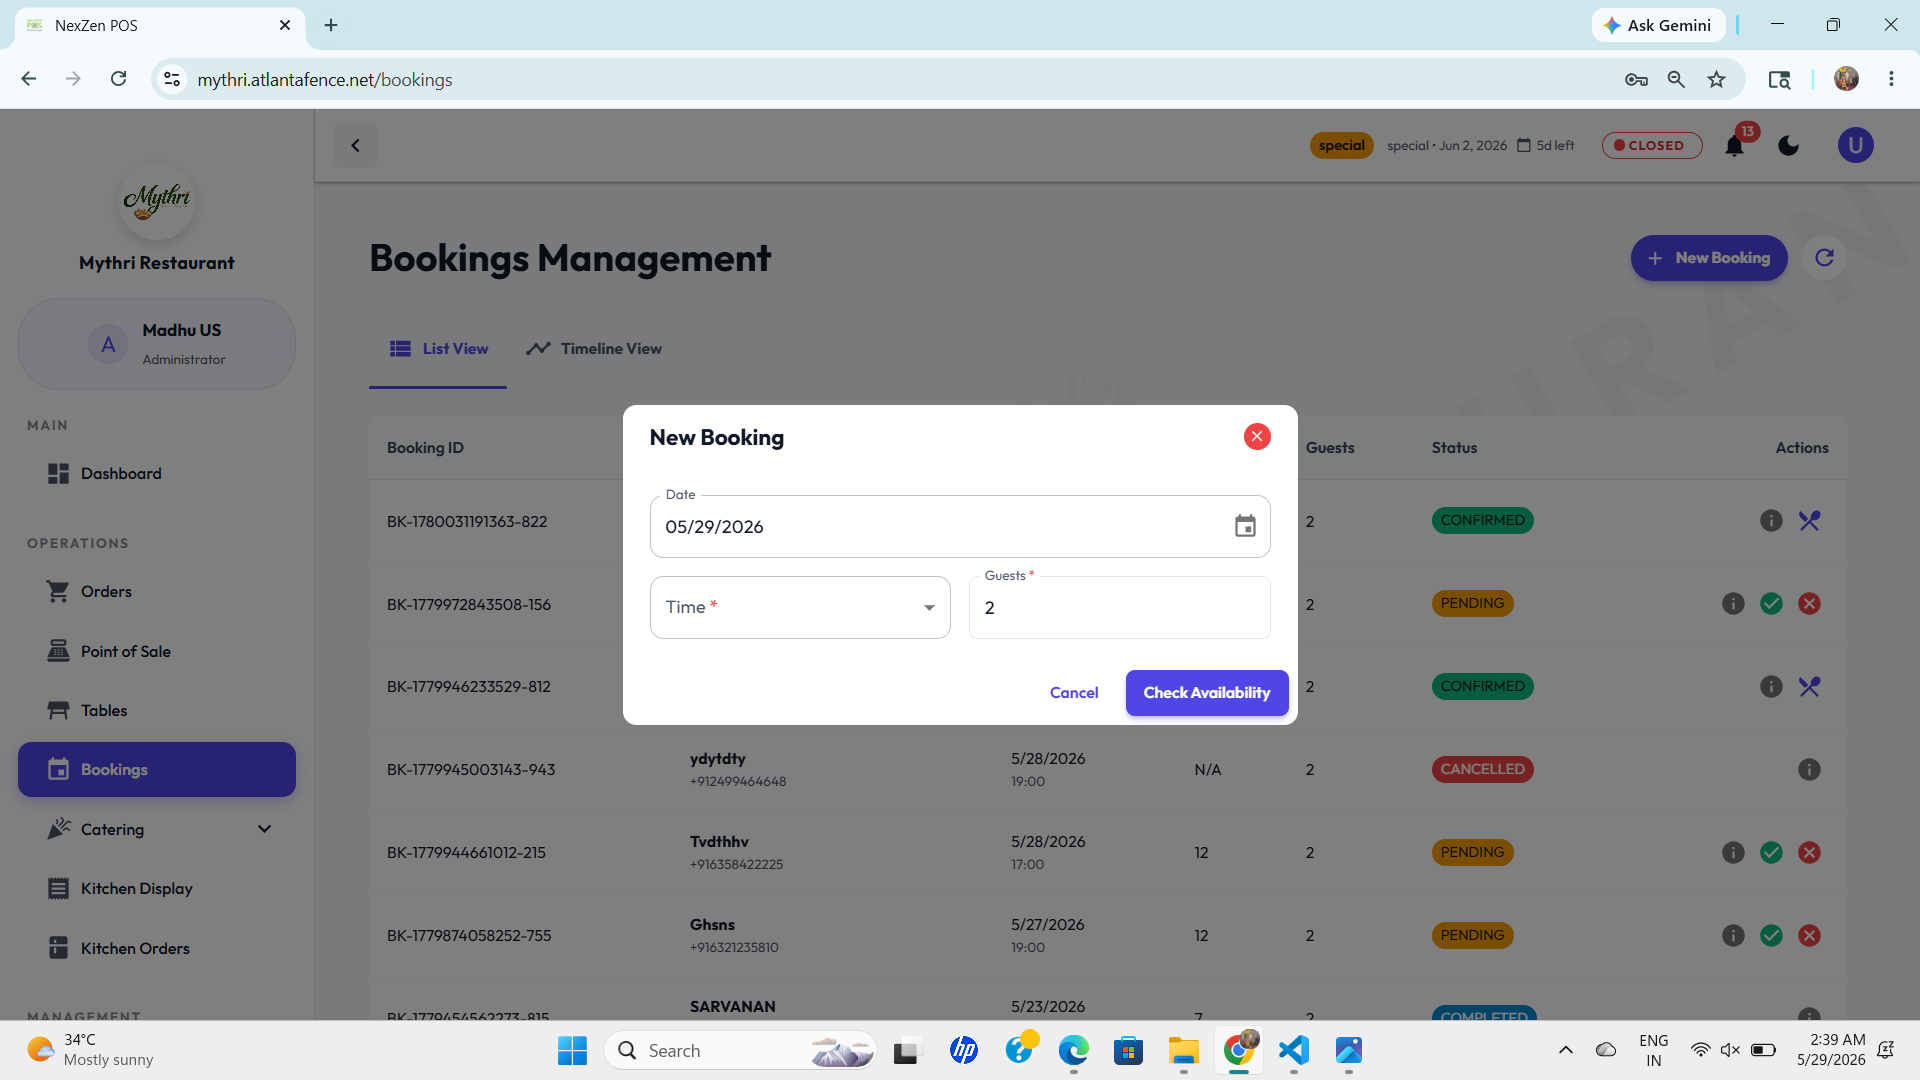
- Step 1: Input Details Select the desired Date, Time, and Number of Guests.
- Step 2: Check Availability Click the purple button to see available tables that match your criteria.
- Step 3: Confirm Select a table and enter customer details (Name/Phone) to finalize the booking.
⏳ Handling Pending Bookings
New booking requests appear at the bottom of the list with a PENDING status. Use the quick action toggles to respond:
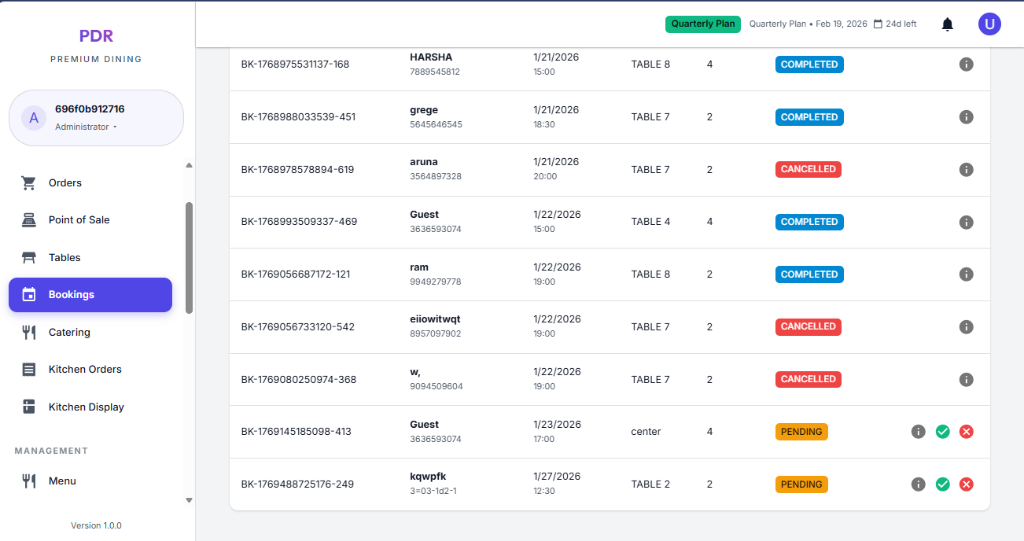
- ℹ️ View Details (Info Icon): Click the gray "i" icon to review the full booking request, including any special notes or customer history.
- ✅ Confirm Booking (Green Check): Click the green checkmark to accept the reservation. The status will update to "Confirmed".
- ❌ Reject Booking (Red Cross): Click the red cross to decline the request. The status will update to "Cancelled".
👍 Approving a Booking
After clicking the green "Confirm"toggle, a confirmation popup will appear. This safeguard ensures you don't accidentally approve a request.
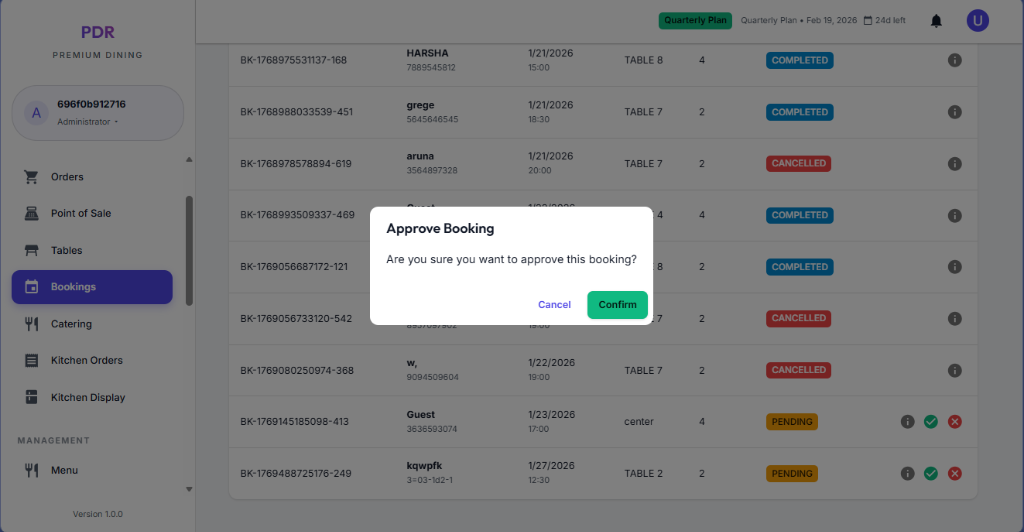
- Verify: Double-check that the table is available for the requested time.
- Action: Click the "Confirm" to finalize the booking. The status will immediately change from PENDING to CONFIRMED (or "Completed" depending on workflow configuration).
🍴 Confirmed Bookings & Ordering
Once a booking is confirmed, the status updates to CONFIRMED and new actions become available:
- Visual Update: The status badge turns green, indicating the table is definitively reserved.
- Order Food (Fork & Knife): A new "Fork and Knife" toggle 🍴 appears next to the details icon. Click this to Start an Order for this specific table immediately.
- Workflow: This seamlessly transitions the guest from "Reserved" to "Ordering" in the Point of Sale system.
🚫 Rejecting a Booking
If you need to decline a reservation, clicking the red Reject toggle will trigger a confirmation popup:
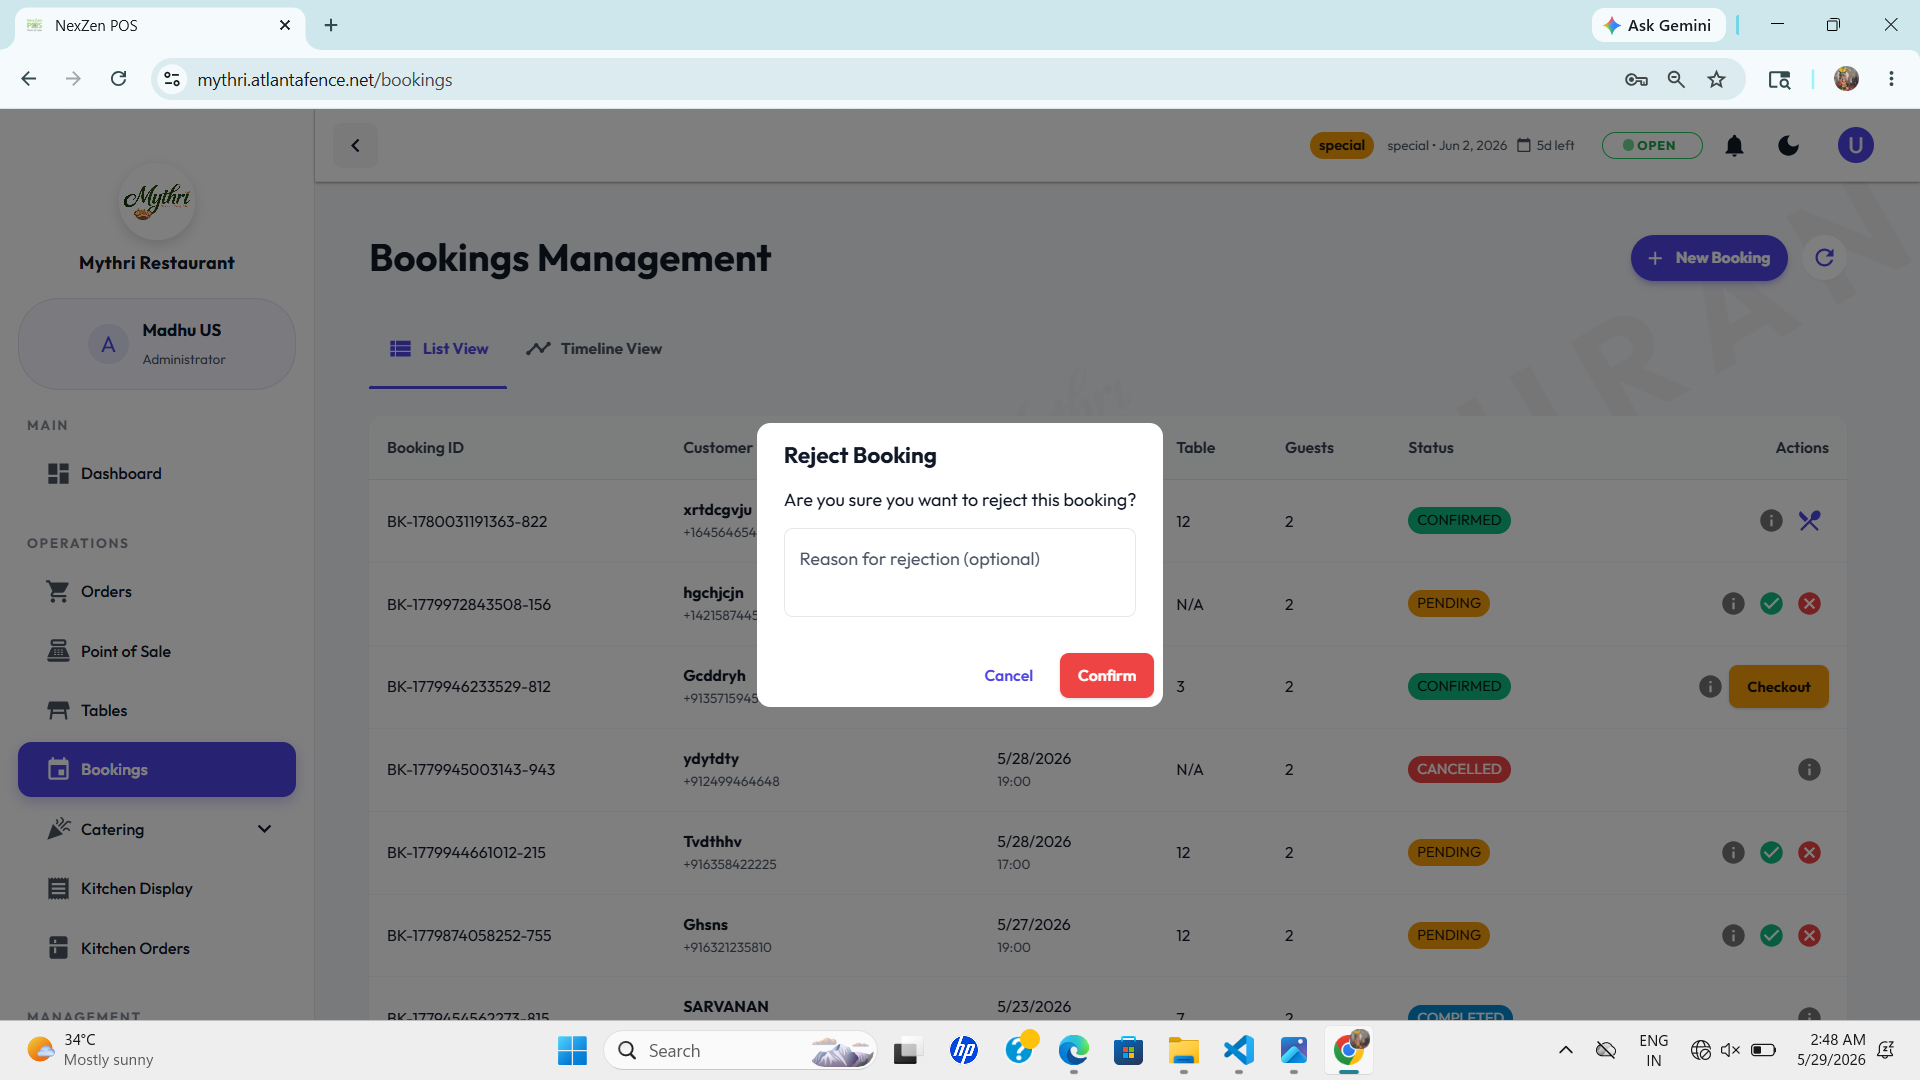
- Reason for Rejection: Optionally, you can enter a note explaining why the booking cannot be accommodated (e.g., "Full Capacity").
- Confirm Rejection: Click the red "Confirm" button to proceed.
- Status Change: The booking status will instantly update to CANCELLED, clearly marked in red.
📊 Visual Timeline View
For a clearer picture of table occupancy over time, switch to the Timeline View tab. This graphical interface maps bookings horizontally:
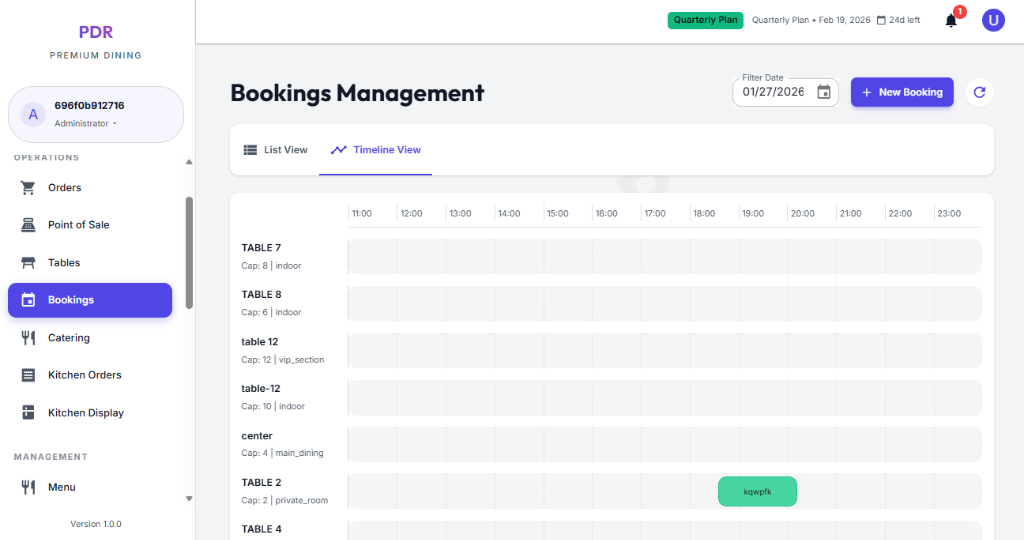
- Y-Axis (Rows): Lists all restaurant tables (e.g., TABLE 7, TABLE 8).
- X-Axis (Columns): Represents the time of day (11:00, 12:00, etc.).
- Green Blocks: Active bookings appear as Green Colored Tabs on the timeline. The length of the block indicates the duration of the reservation.
- Quick Identification: Hovering over a green block reveals the guest's name (e.g., "kqwpfk"), allowing for instant recognition of who is occupying which slot.
👆 Booking Details Popup
Clicking on any green booking block in the timeline opens a detailed popup card for that specific reservation:
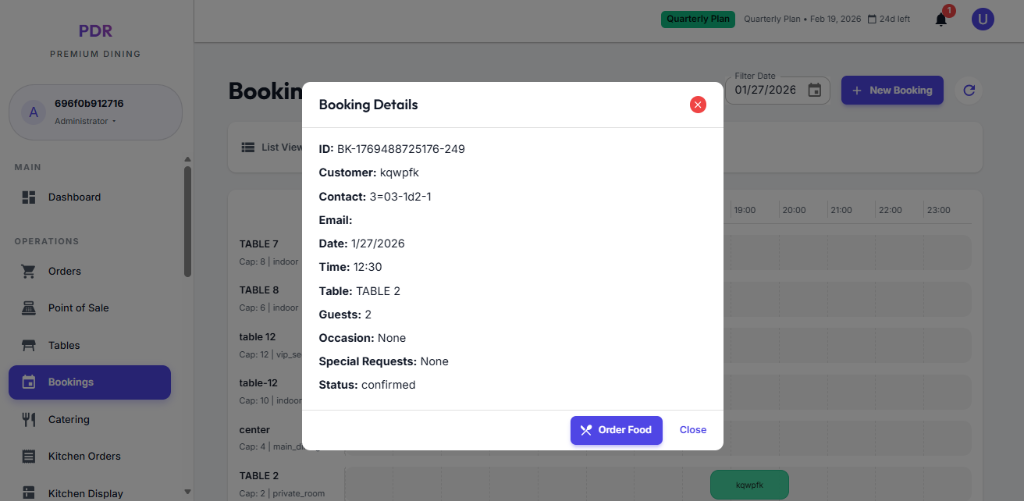
- Full Information: View comprehensive details including Customer Name, Contact, Table ID, Guest Count, and any Special Requests or occasions.
- Direct Action: The purple "Order Food" button allows you to jump straight to the POS screen for this table, pre-linking the order to the booking.