Financial Ledger
A centralized financial ledger for tracking procurement costs, vendor payments, and operational spend across your restaurant business.
💰 Financial Ledger Overview
The ledger interface gives you a real-time snapshot of purchase orders, vendor transactions, and payment status from one clean dashboard. Use the top search bar and filters to quickly narrow records by order, vendor, category, status, or payment method.
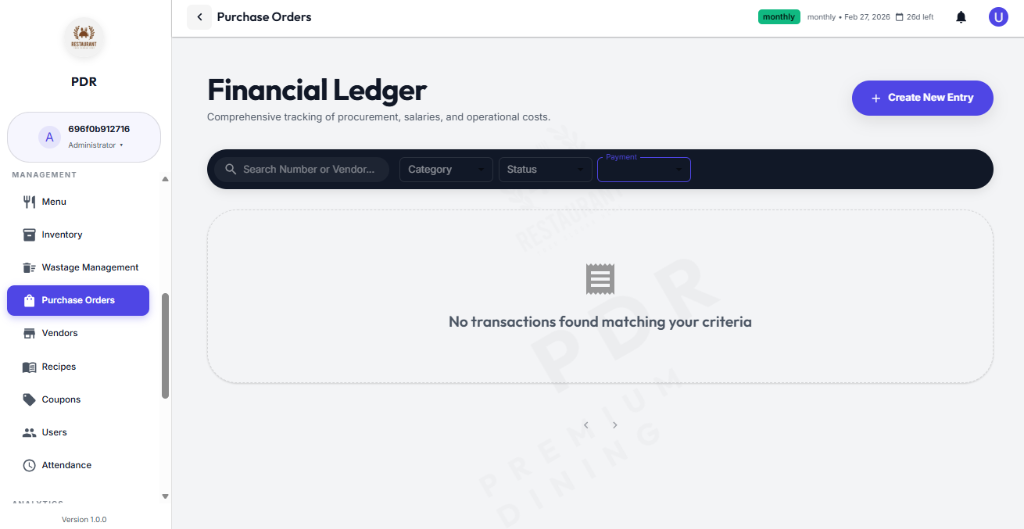
Key insights from the financial ledger screen include:
- Search Order or Vendor: Find specific entries by purchase order number or supplier name.
- Category Filter: See only raw materials, salaries, utilities, or other expense types.
- Status Filter: Track orders that are completed, pending, or still in progress.
- Payment Filter: Separate paid, unpaid, and partially paid transactions.
- Create New Entry: Add a fresh purchase or expense record with the top-right button.
🏷️ Categorizing Expenses
Properly categorizing your expenses is crucial for accurate financial reporting. The system provides a predefined list of purchase categories to keep your ledger organized:
- Raw Materials: Ingredients and food stock needed for the kitchen.
- Salaries: Staff wages and payroll expenses.
- Rent: Monthly lease payments for the property.
- Utilities: Electricity, water, gas, and internet bills.
- Maintenance: Repairs and upkeep costs for equipment and facility.
- Supplies: Non-food items like napkins, cleaning agents, and packaging.
- Other: Miscellaneous expenses not covered by the above.
📊 Tracking Status & Payments
Every purchase order goes through a lifecycle. You can track this using the Status and Payment filters:
Order Status
- Draft: Order created but not yet finalized.
- Pending: Awaiting approval or processing.
- Approved: Confirmed and proceeding.
- Received: Goods or services have been delivered.
- Cancelled: Order has been voided.
Payment Status
- Unpaid: Payment has not been made yet.
- Partial: A portion of the total amount has been paid.
- Paid: Full payment has been completed.
📝 Create Entry Form
After clicking + Create New Entry, the ledger opens a detailed purchase order form. This page is built around two main sections: Vendor Details and Items, making it fast to capture supplier invoices and inventory spend.
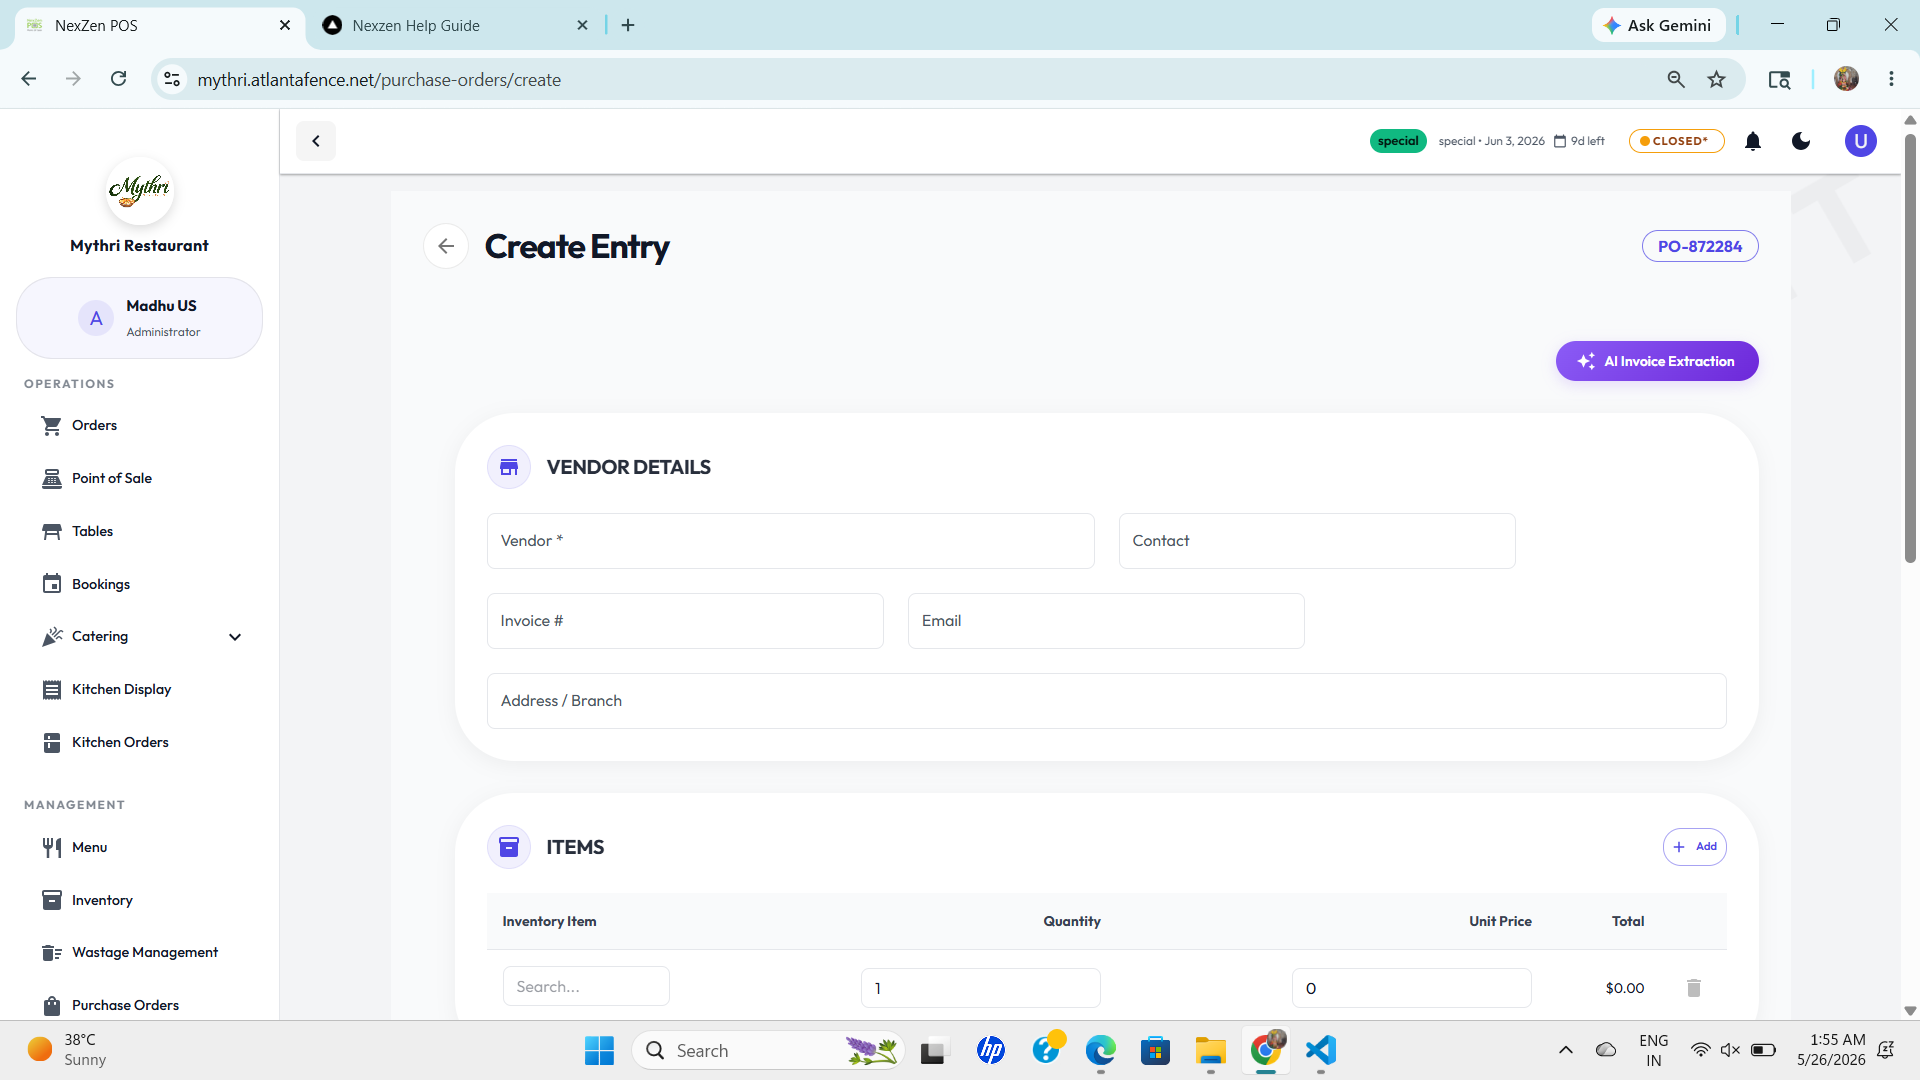
Enter vendor details such as Vendor, Contact, Invoice #, Email, and Address / Branch.
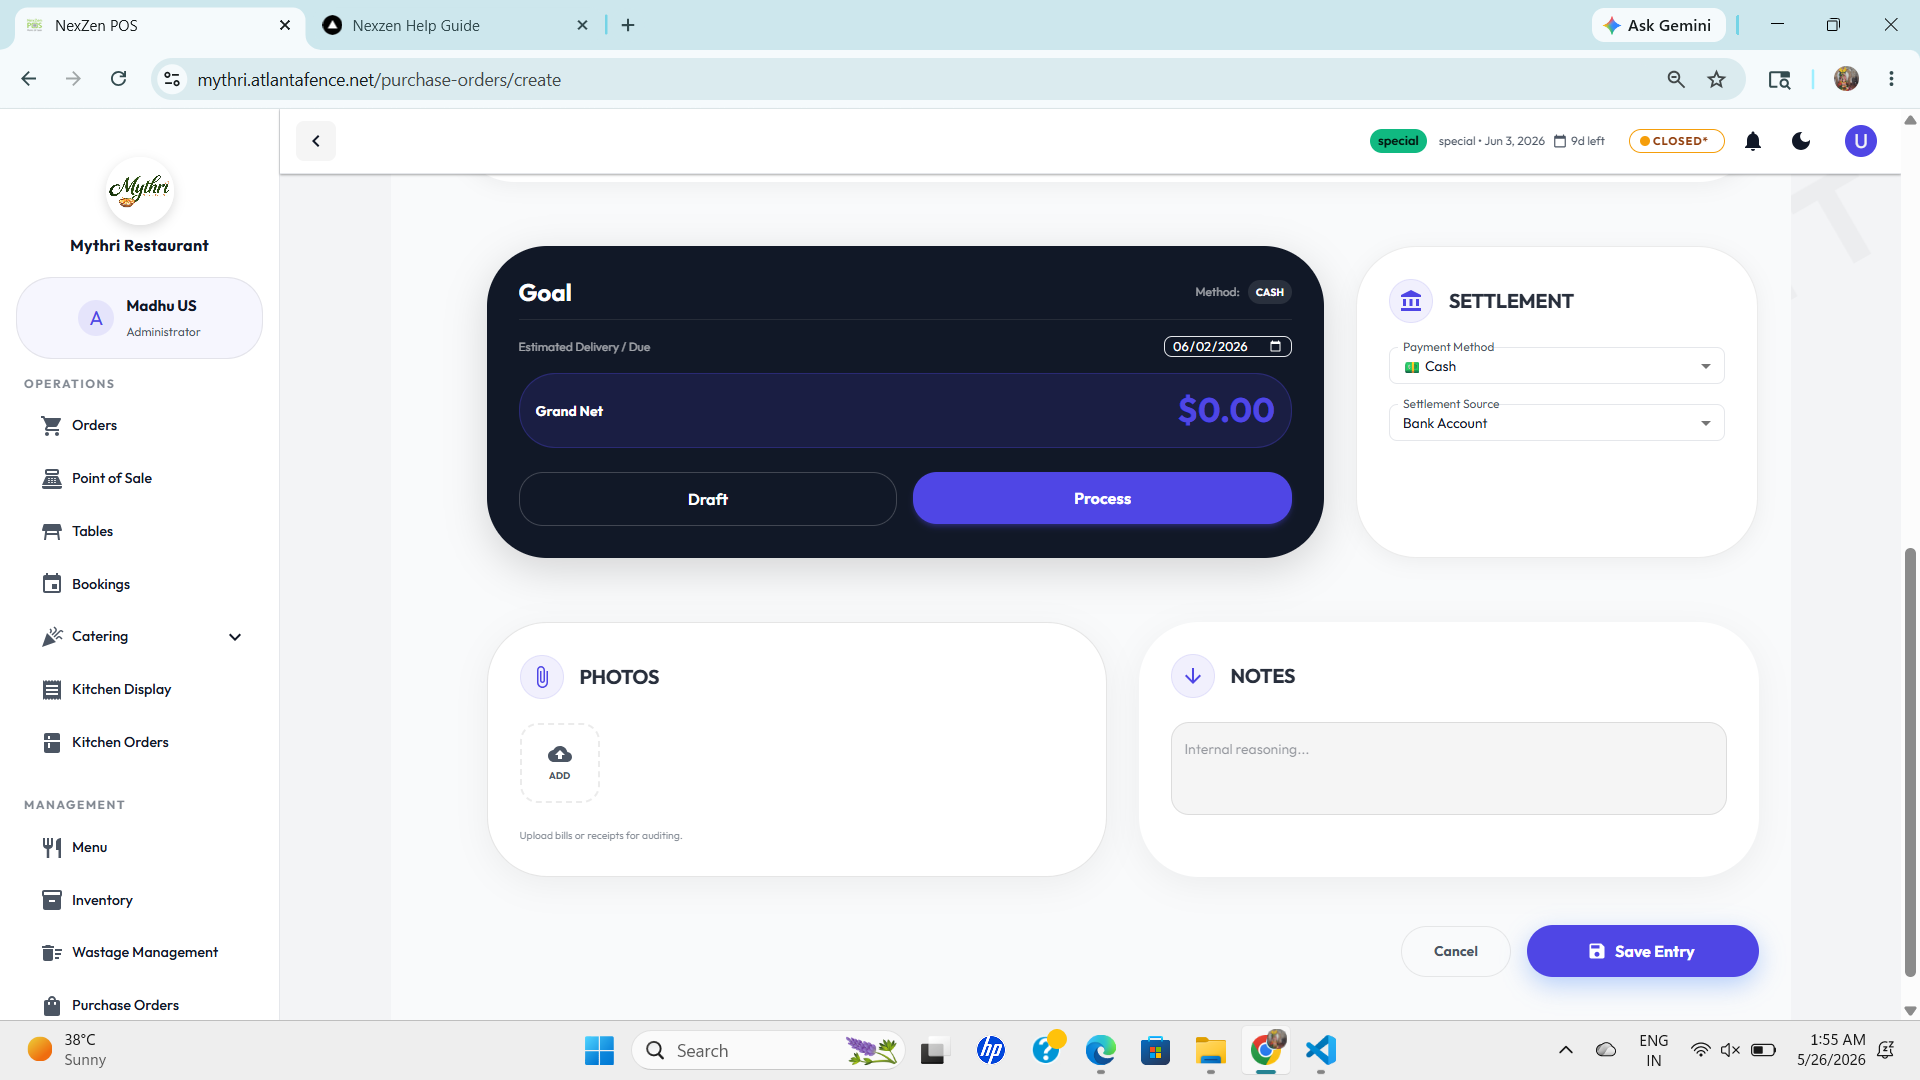
The second step shows the settlement section with payment method and source, plus the photos upload and internal notes cards. Use the Draft or Process buttons to save the order status, and Save Entry when ready.
- Vendor Details: Start with supplier information and invoice metadata so the order is tied to the correct vendor.
- Item Rows: Search inventory items, enter quantity, set unit price, and confirm item totals.
- Settlement: Choose the payment method and settlement source such as Cash and Bank Account.
- Photos: Upload bills or receipts for auditing and documentation.
- Notes: Record internal reasoning or remarks for the transaction.
- Action Controls: Save the entry or keep it as a draft using the buttons shown in the form footer.
Pro tip: use the vendor search and item search fields to quickly populate standard suppliers and inventory items, reducing manual typing and improving accuracy.