Vendors
Manage your supplier network from one central dashboard, including contact details, business address, categories, and active status.
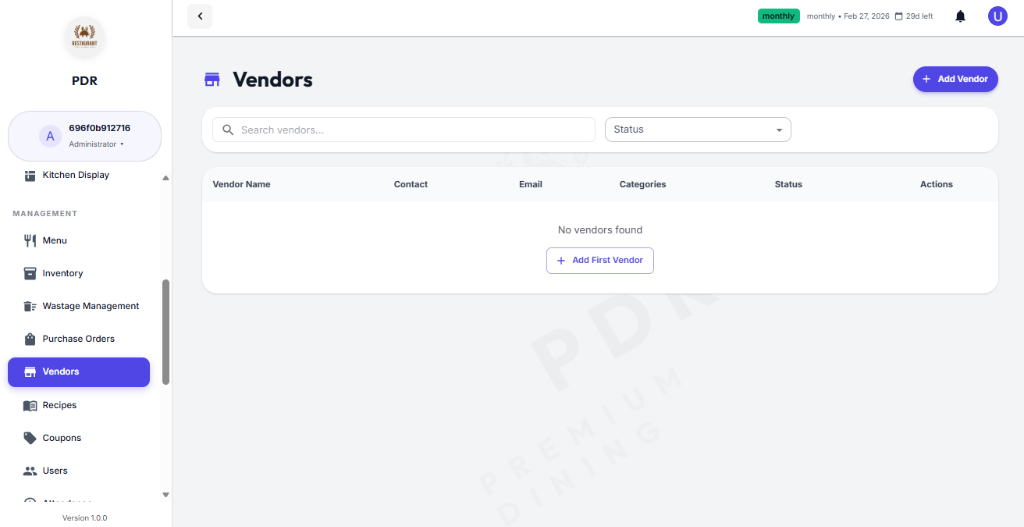
🏪 Vendor Overview
The vendor screen gives you a quick snapshot of suppliers, with a searchable list and status controls for easy vendor management.
🔍 Search & Status
Use the top search field to find vendors by name or shop name. The status dropdown filters suppliers by Active or Inactive.
📋 Vendor Table
The main table displays Vendor Name, Shop Name, Contact, Email, Categories, and current Status.
➕ Add New Vendor
Click the purple + Add New Vendor button to open the vendor registration form and add a new supplier.
📝 Add New Vendor
Click the + Add New Vendor button to open the vendor registration modal. Fill in the fields below to register a new supplier.
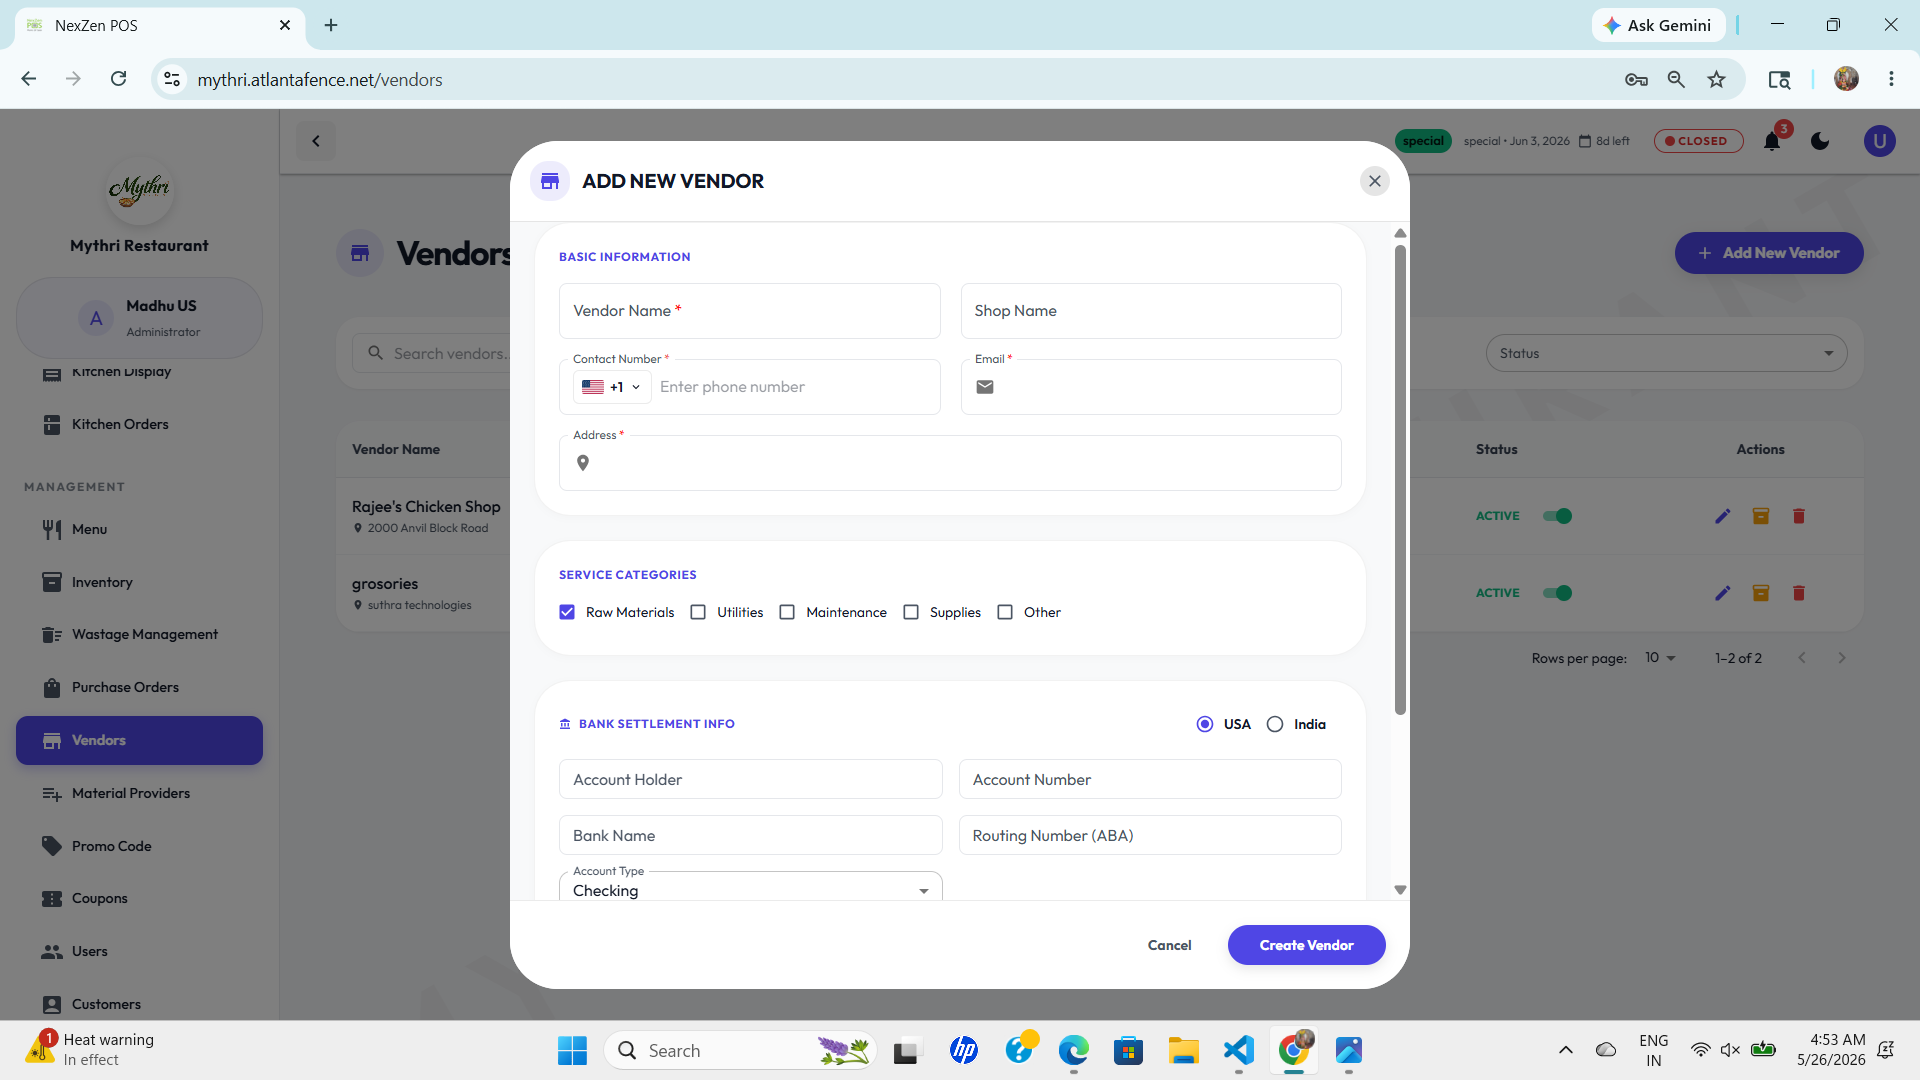
The registration form contains these sections:
- Basic Information: Provide Vendor Name, Shop Name, Contact Number (with country selector), Email, and Address / Branch. These fields ensure orders and communications go to the right place.
- Service Categories: Select one or more checkboxes to classify the supplier (for example: Raw Materials, Utilities, Maintenance, Supplies, or Other).
- Bank Settlement Info (optional): Add payment details such as Account Holder, Account Number, Bank Name, Routing Number (ABA), choose Account Type, and select the settlement country (USA / India) if applicable.
- Notes & Documentation: Optionally upload bills or receipts and add internal notes for future reference.
- Complete: Use the Create Vendor button (bottom-right) to save the new supplier, or Cancel to close the modal without saving.
✏️ Edit Vendor
Click the Edit (pencil) icon in the vendor list to open the Edit Vendor modal. The form is pre-filled with the supplier's current data so you can make quick updates.
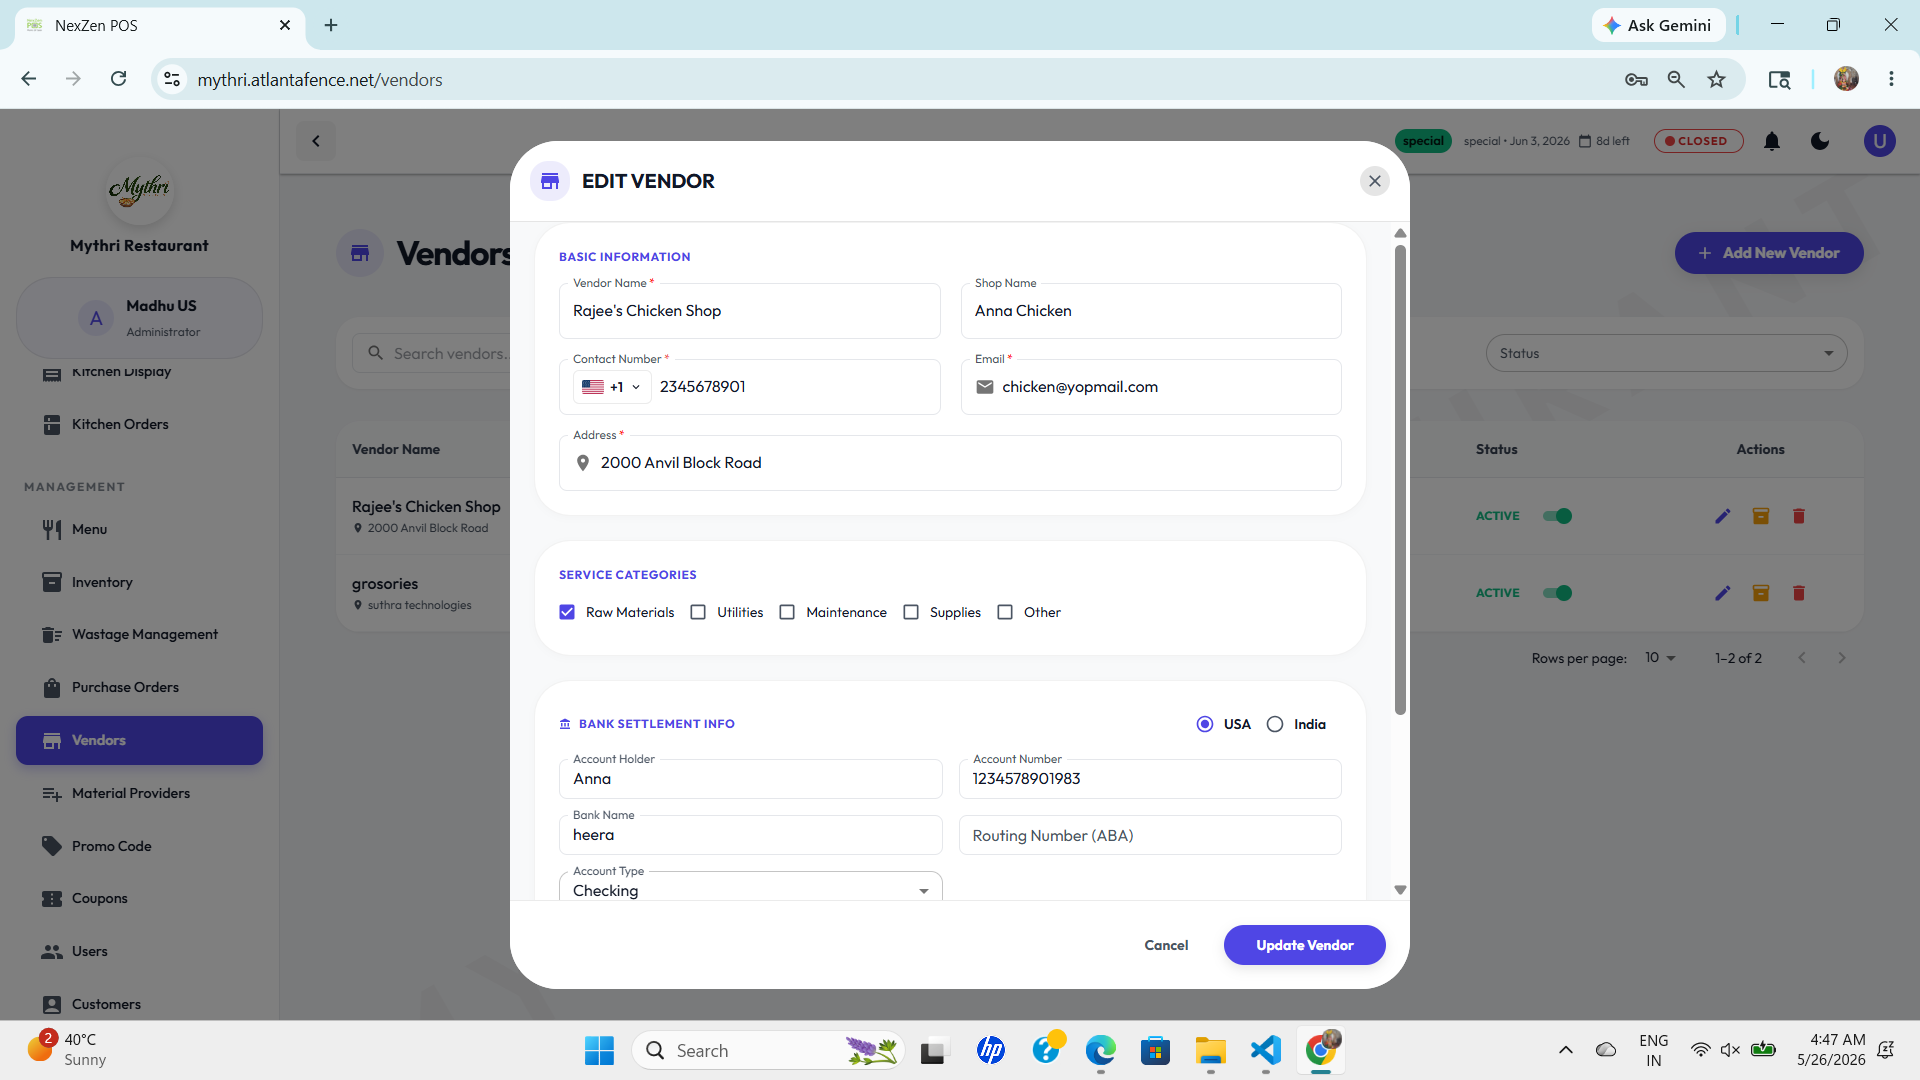
The edit form matches the screenshot and includes these sections:
- Basic Information: Update Vendor Name, Shop Name, Contact Number (with country selector), Email, and Address.
- Service Categories: Toggle checkboxes for categories such as Raw Materials, Utilities, Maintenance, Supplies, or Other.
- Bank Settlement Info: Edit payment details including Account Holder, Account Number, Bank Name, Routing Number (ABA), choose Account Type, and select the settlement country (USA or India).
- Finish: Click Update Vendor to save the changes or Cancel to close the modal without saving.
🔄 Managing Vendor Status
You can temporarily deactivate a vendor without deleting them from your system. This is useful if a supplier is out of stock or you've paused ordering from them.
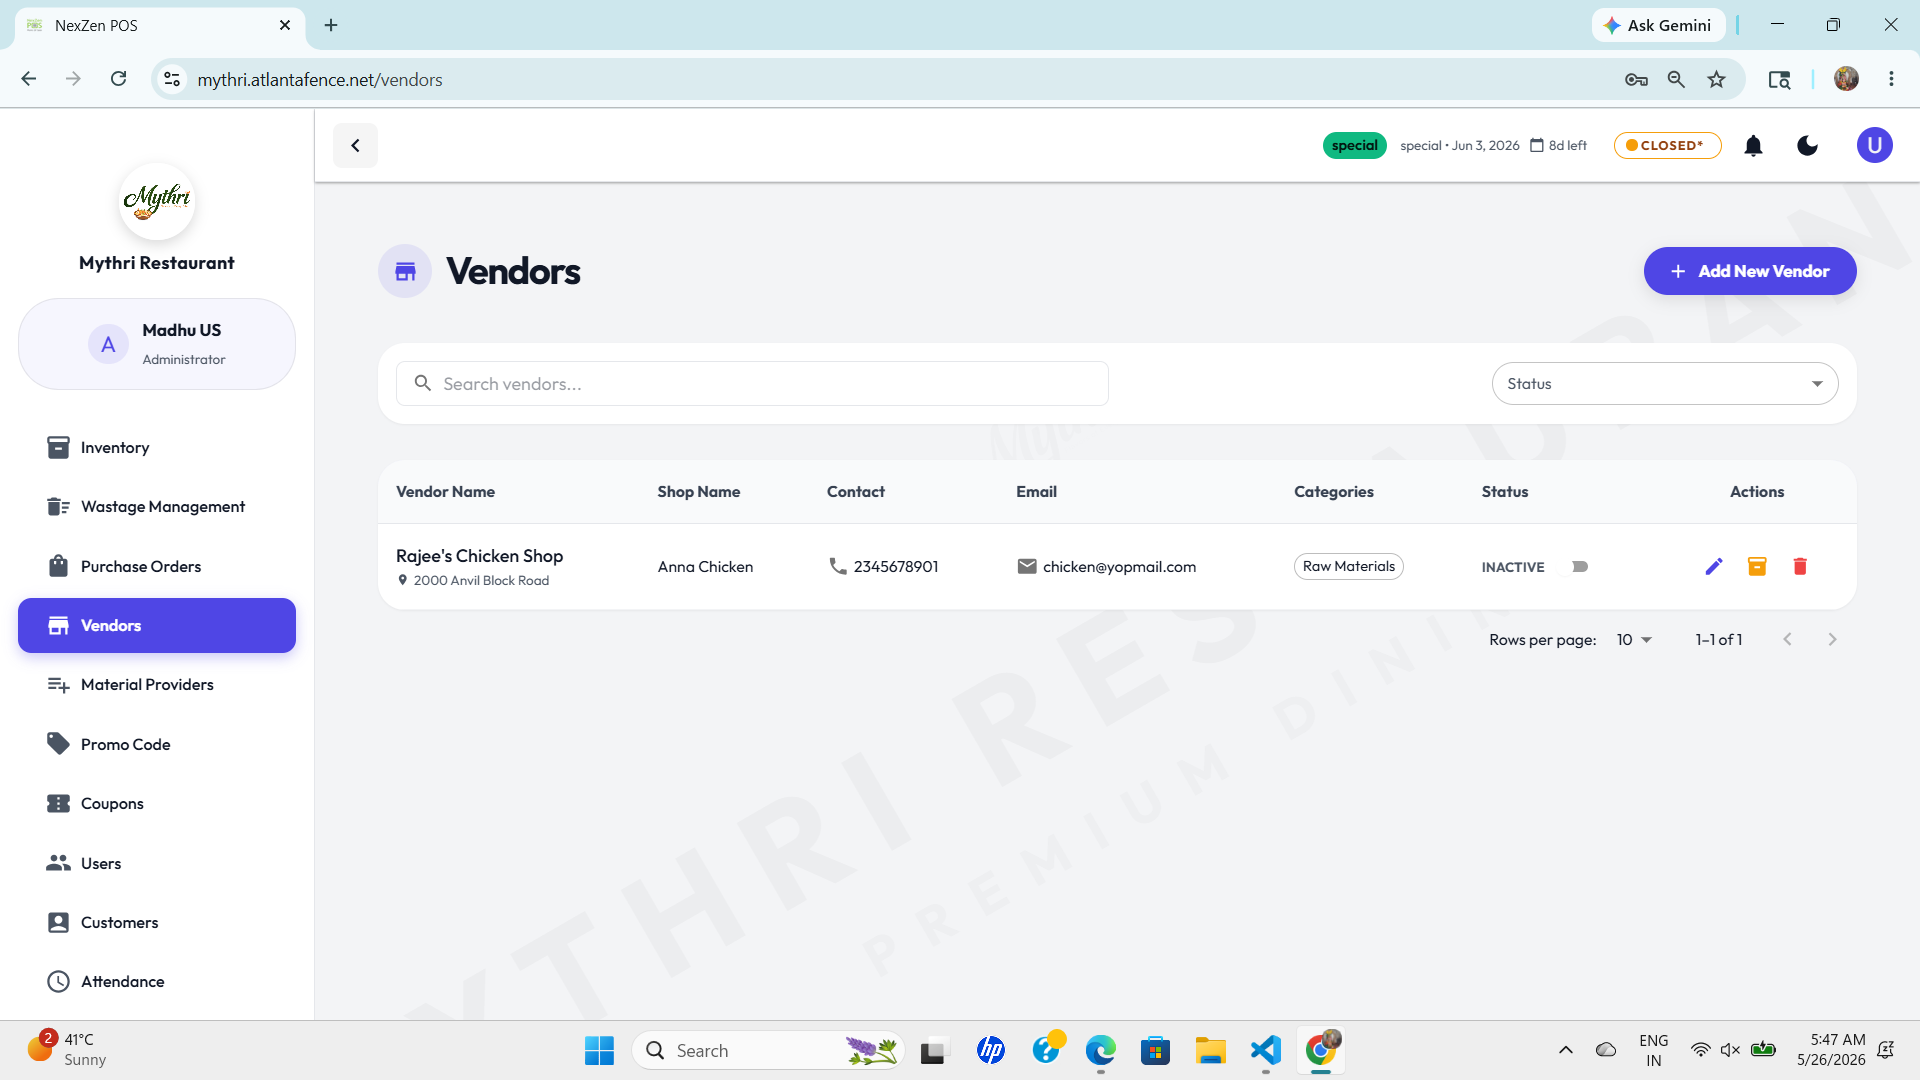
To change a vendor's status:
- Locate the Status column in the vendor list.
- Click on the green Active badge.
- The status will instantly toggle to a grey Inactive badge.
- Clicking it again will revert the status back to Active.
🗑️ Deleting a Vendor
If you no longer work with a supplier and want to remove them permanently, use the delete option.
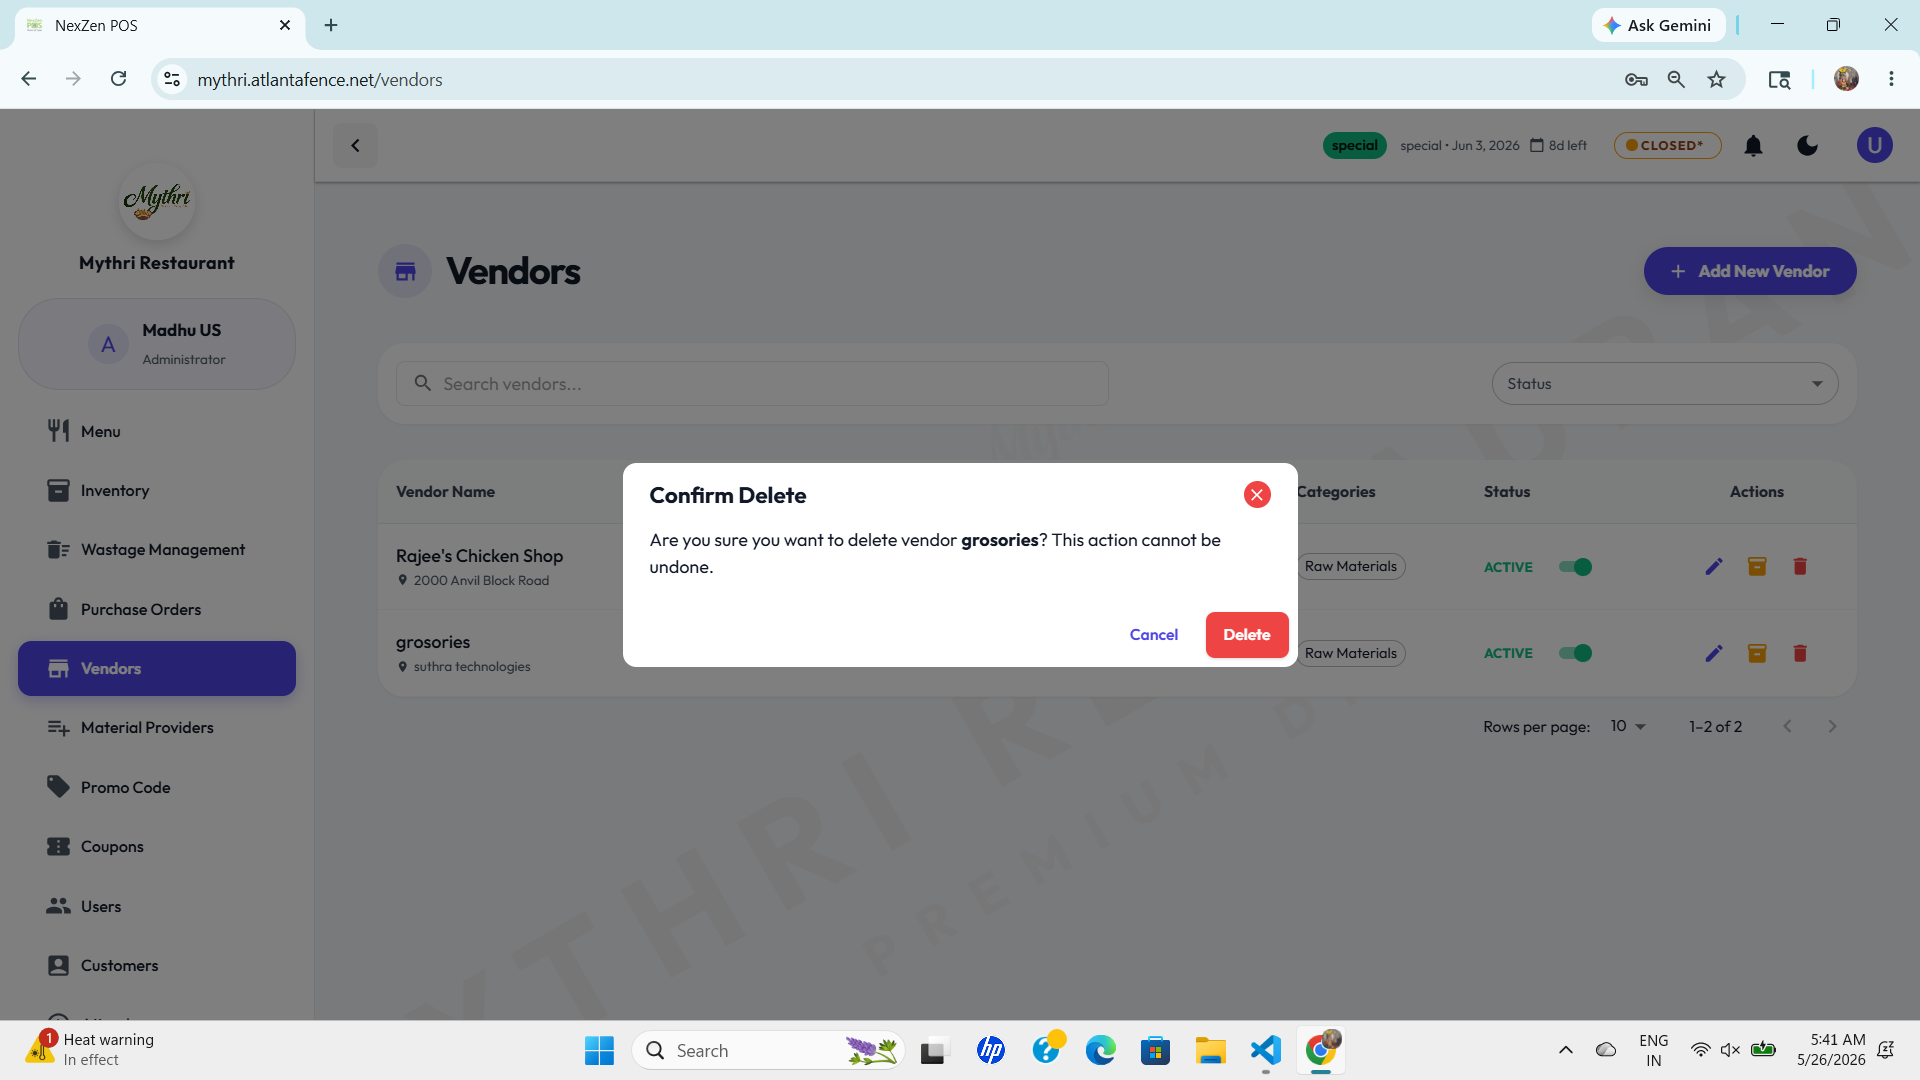
To delete a vendor:
- Click the red Delete (trash can) icon in the Actions column.
- A Confirm Delete warning will pop up asking: "Are you sure you want to delete vendor [Name]?"
- Caution: This action cannot be undone. Make sure you really want to remove this vendor before clicking the red Delete button.
- If you change your mind, simply click Cancel.