Loading...
Tables
Organize your floor plan and track real-time table occupancy.
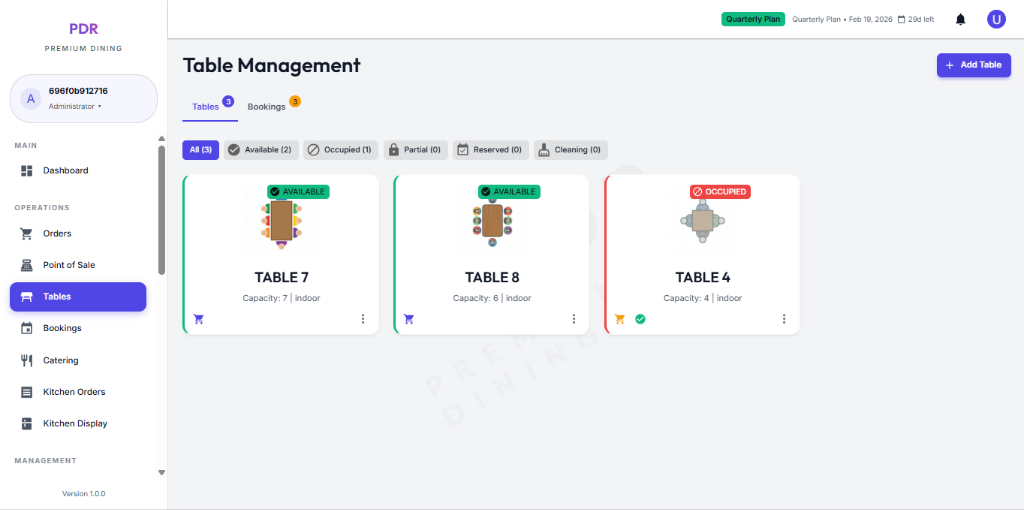
🪑 Floor Plan Overview
The Tables tab provides a bird's-eye view of your restaurant's seating. Use this central hub to monitor availability and initiate service.
Status Filters
Use the top filter buttons to quickly narrow the dashboard to the tables you need right now.
- Available Shows tables ready to seat guests immediately.
- Occupied Displays tables currently serving a party.
- Reserved Lists tables booked for an upcoming reservation.
Table Card Anatomy
Each card gives you a quick snapshot of the table's state:
- Visual Identifier: Iconic representation of table shape and seating.
- Details: Shows the Table Name, Capacity, and Location like Indoor or Outdoor.
- Status Badge: A visible label that indicates whether the table is free, occupied, or reserved.
⚡ Interaction Workflows
The table dashboard is built for fast operations: tap the table card or action buttons to move from floor planning to order management.
1. Start an Order Quickly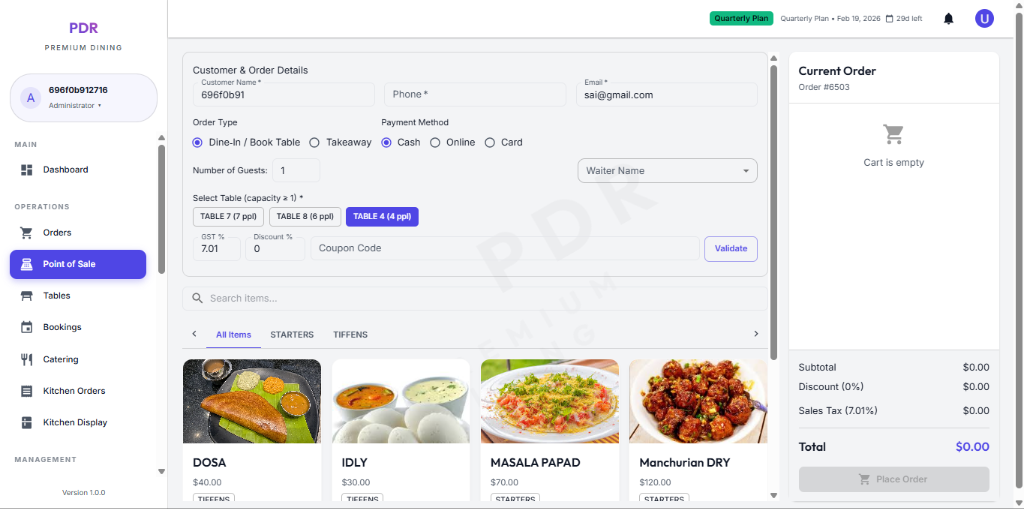
Use the shopping cart icon on the card to open the POS screen with that table pre-selected.
The table is reserved for ordering and the POS opens ready for menu selection.
2. Book or Reserve a Table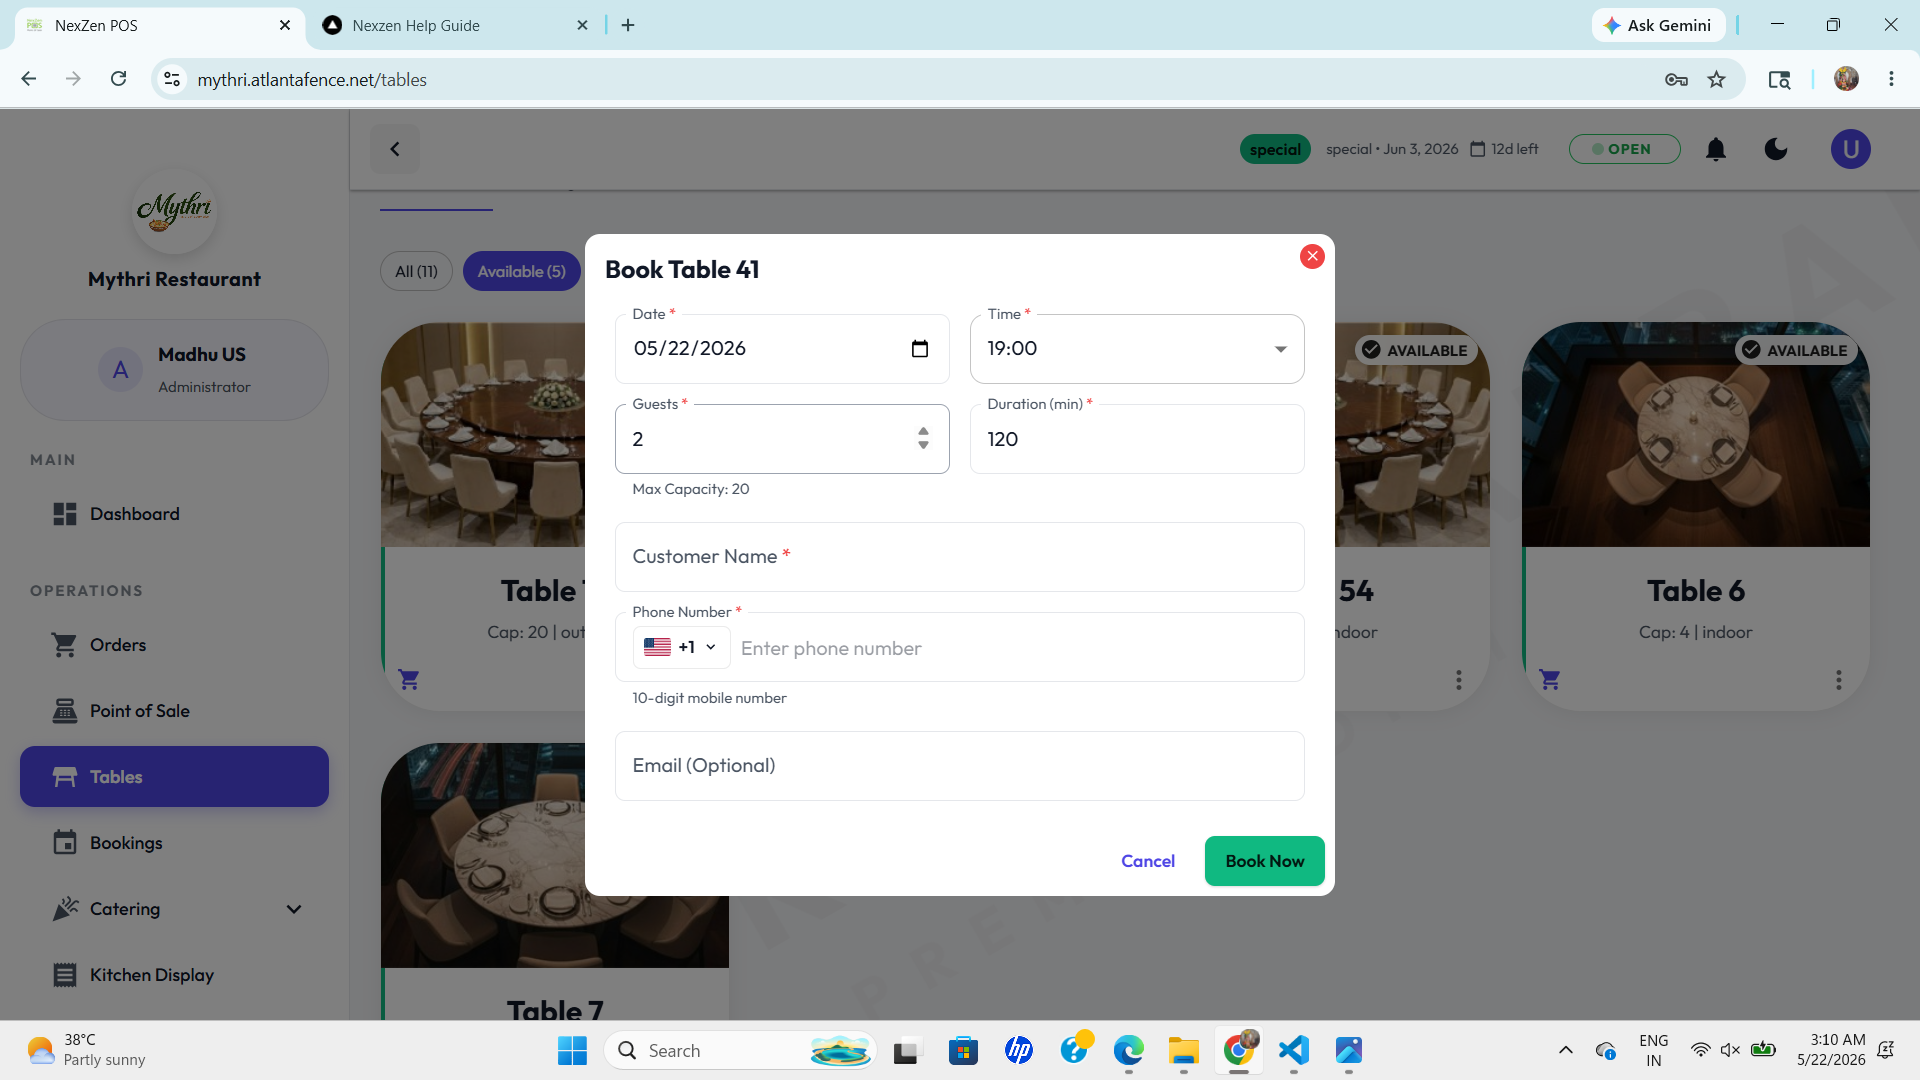
Tap the main table card area to open the reservation dialog and assign guests, time, and staff.
This workflow makes it easy to turn a table card into a confirmed booking without leaving the table view.
➕ Adding Tables
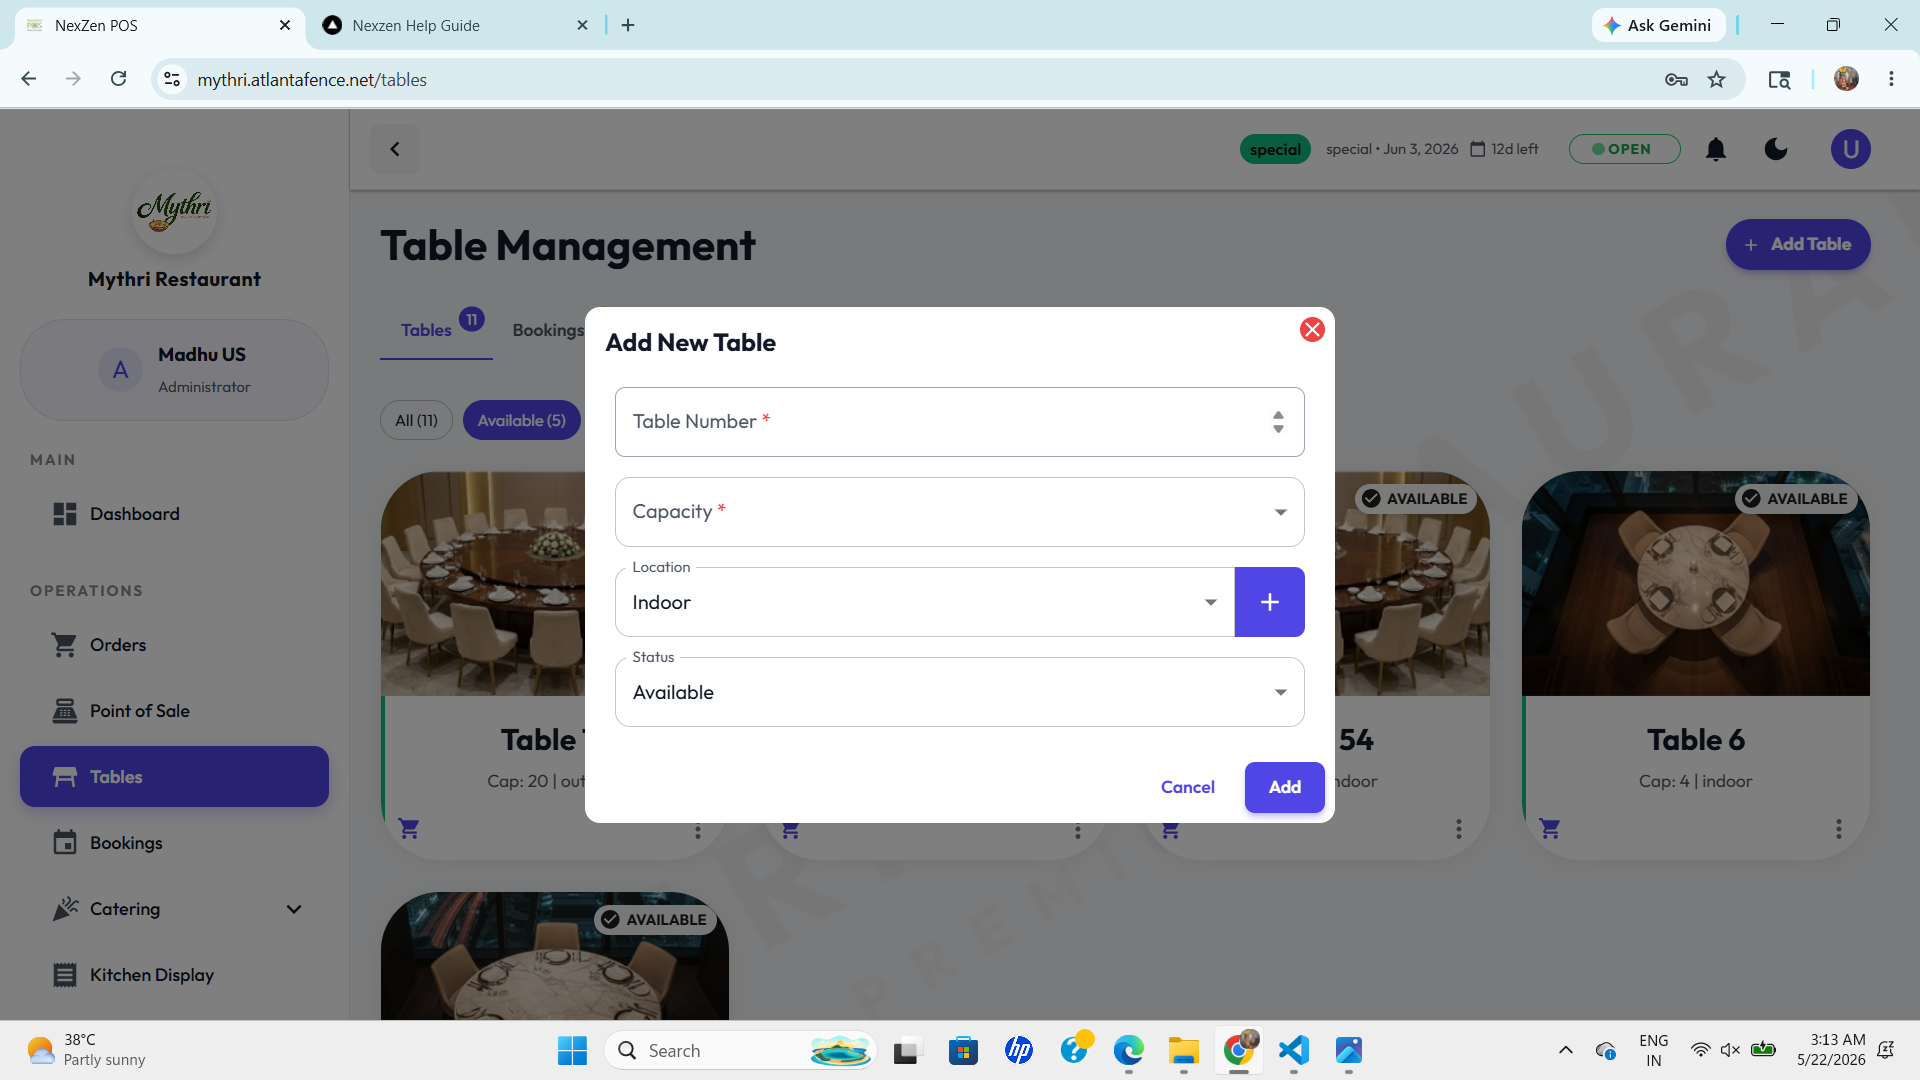
Click the "+ Add Table" button in the top-right corner to register a new seating option.
- Table Number: Assign the table a unique number or label so staff can find it quickly.
- Capacity: Set the maximum guest count so the system recommends the right table for the party.
- Location: Choose the table zone like Indoor, Outdoor, or another service area.
- Initial Status: Start the table as Available, Occupied, or Reserved based on its current state.
⚙️ Management
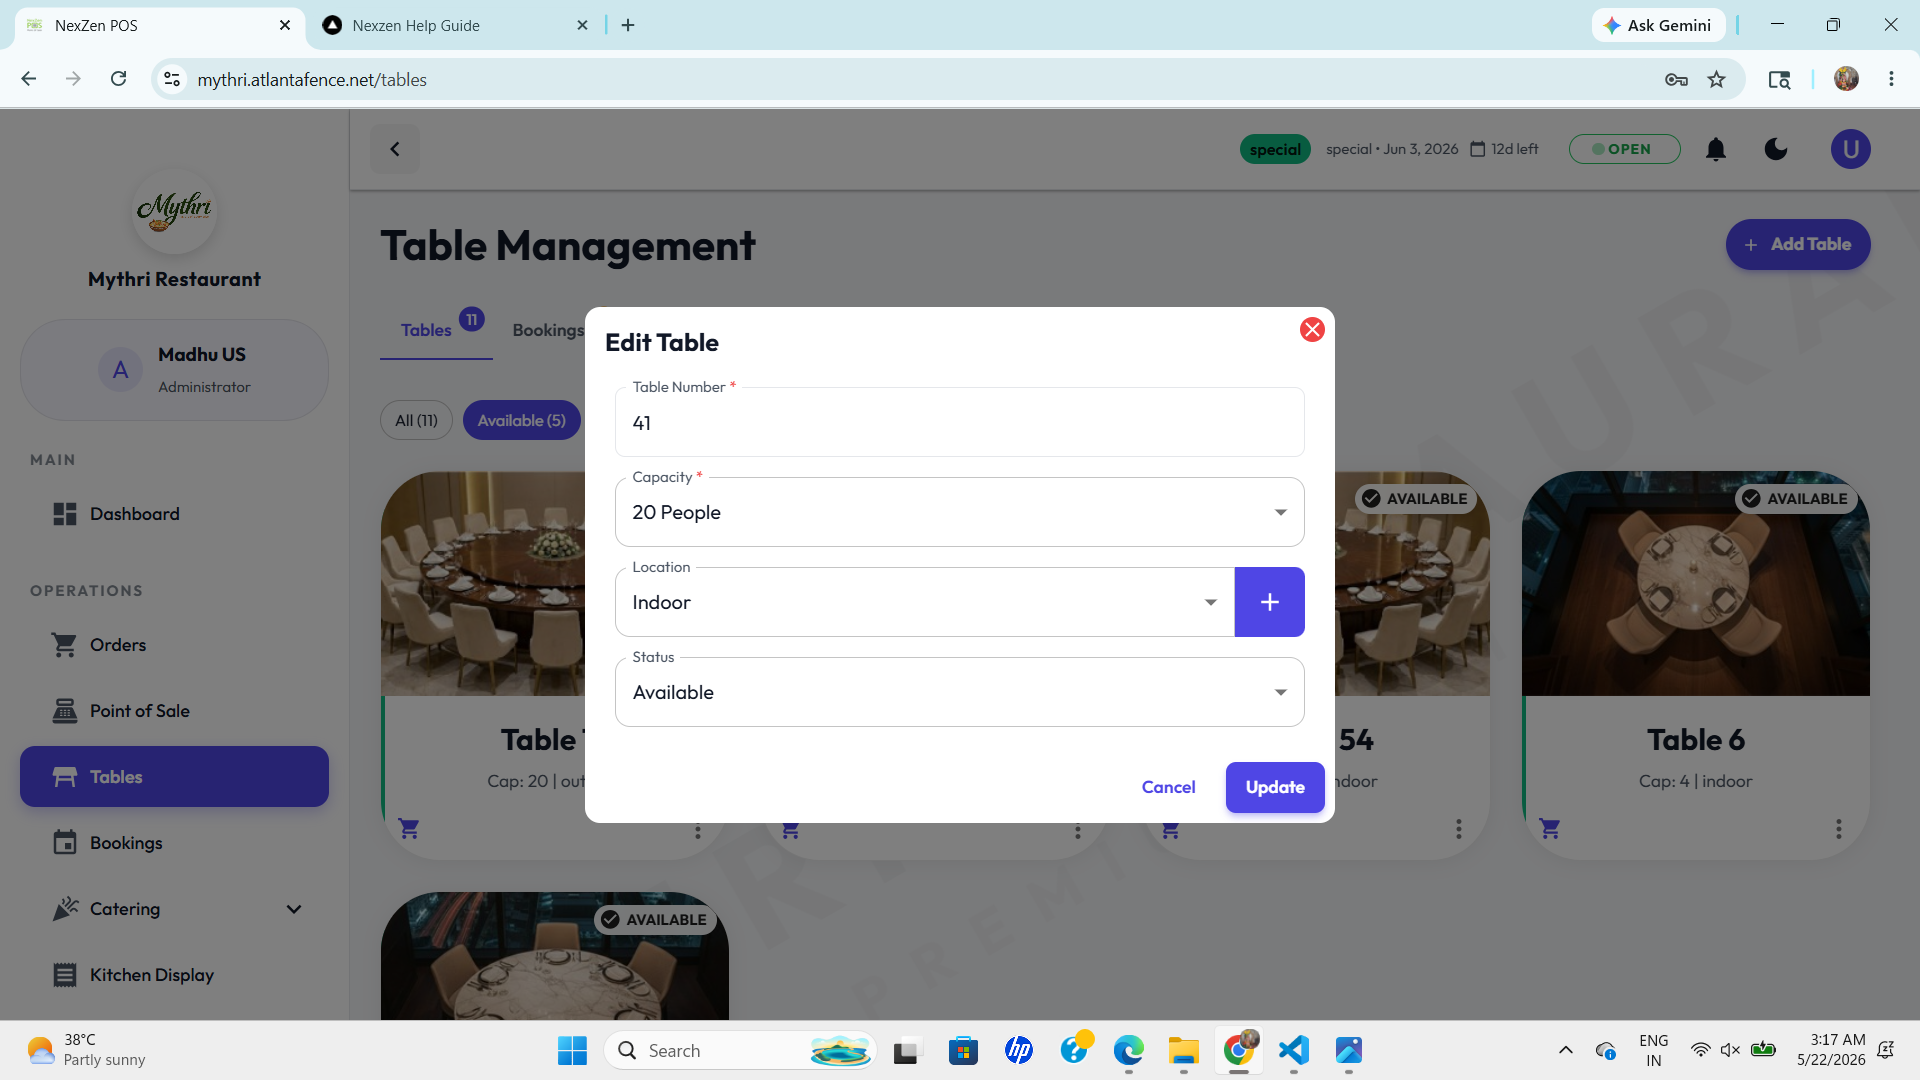
Click the Three-Dot Menu on a table card to edit its details or remove it from the floor plan.
- Edit Table: Opens a modal where you can update the Table Number, Capacity, Location, and current Status.
- Save Changes: Keep your seating information accurate by updating table attributes as the floor layout changes.
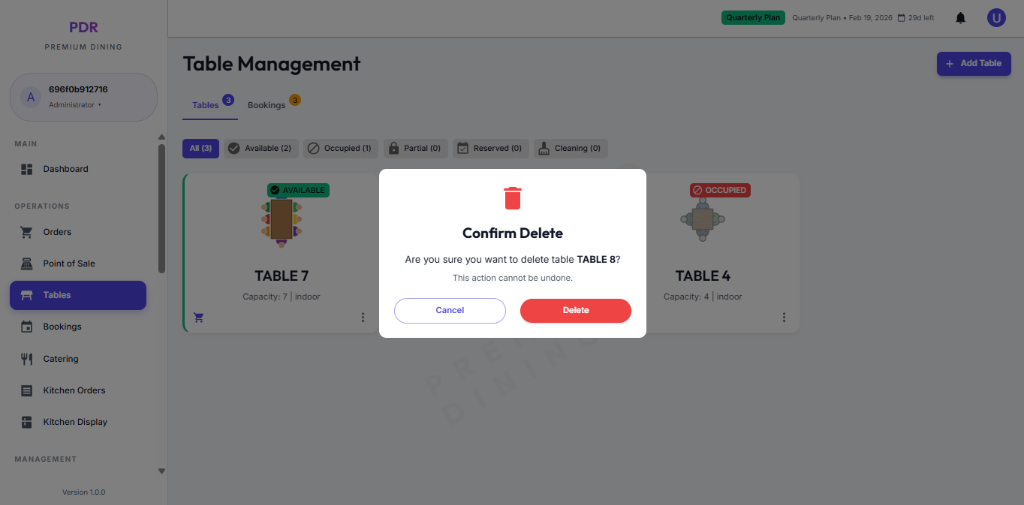
- Delete: Permanently removes the table from your floor plan. You will be asked to confirm this action.
📅 Bookings
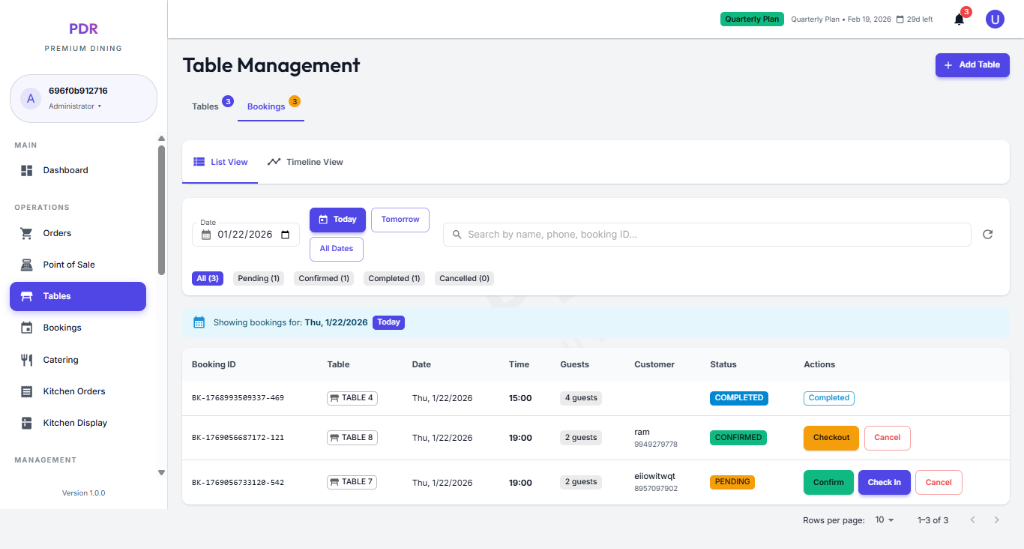
Switch to the Bookings tab to handle reservations. The interface offers a comprehensive list of all scheduled visits.
Views & Filters
- Date Controls: Quickly filter by Today or select a custom date range.
- Status Tabs: Filter the list by All, Pending, Confirmed, Completed, or Cancelled.
- Search: Locate specific reservations by entering a Name, Phone Number, or Booking ID.
- Refresh: Click the circular arrow icon to reload the list with the latest booking data.
Reservation Details
The table displays key information for every booking:
- Booking ID: Unique reference number.
- Customer: Guest name and contact number.
- Table & Time: Assigned table (e.g., Table 4) and scheduled slot.
- Guests: Total party size (e.g., "4 guests").
Booking Actions
Manage each reservation directly from the list actions column:
- Confirm Accept a pending booking request.
- Check In Mark guests as arrived to start their session.
- Checkout Complete the session and free up the table.
- Completed View details of a finalized reservation.
- Cancel Void the reservation if guests cannot make it.
⏳ Timeline View
For a clear perspective on table usage over time, switch to the Timeline View. This visual schedule helps maximize occupancy by revealing gaps.
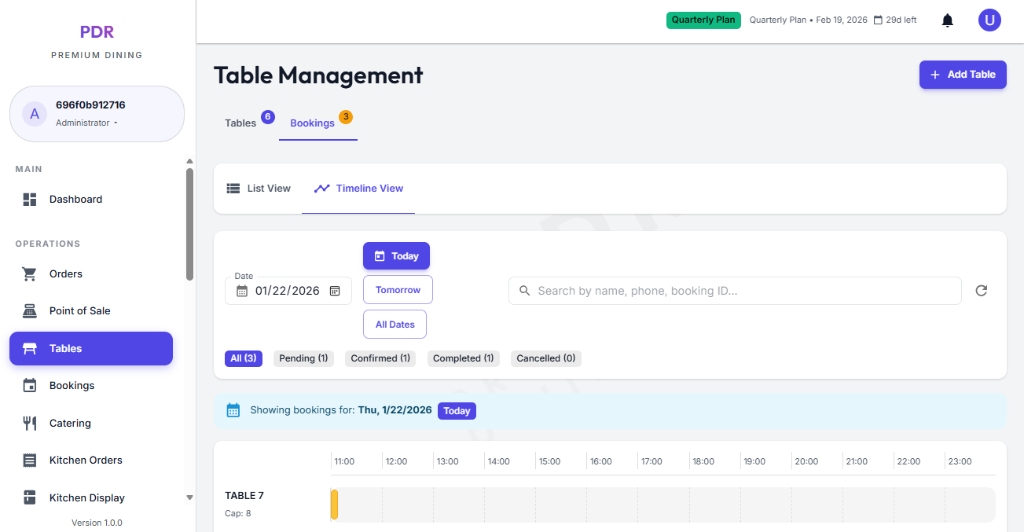
- Visual Schedule: Timeline bars (e.g., 11:00 - 23:00) show each booking window and highlight available gaps between reservations.
- Table Tracking: See which tables (e.g., "TABLE 7") are reserved at each hour so you can balance capacity across the day .
- Reschedule Fast: Drag booking blocks to shift time slots without reopening the reservation form.
👆 Booking Interaction
Click a booking block to open the Booking Details modal and manage the reservation directly from the timeline.
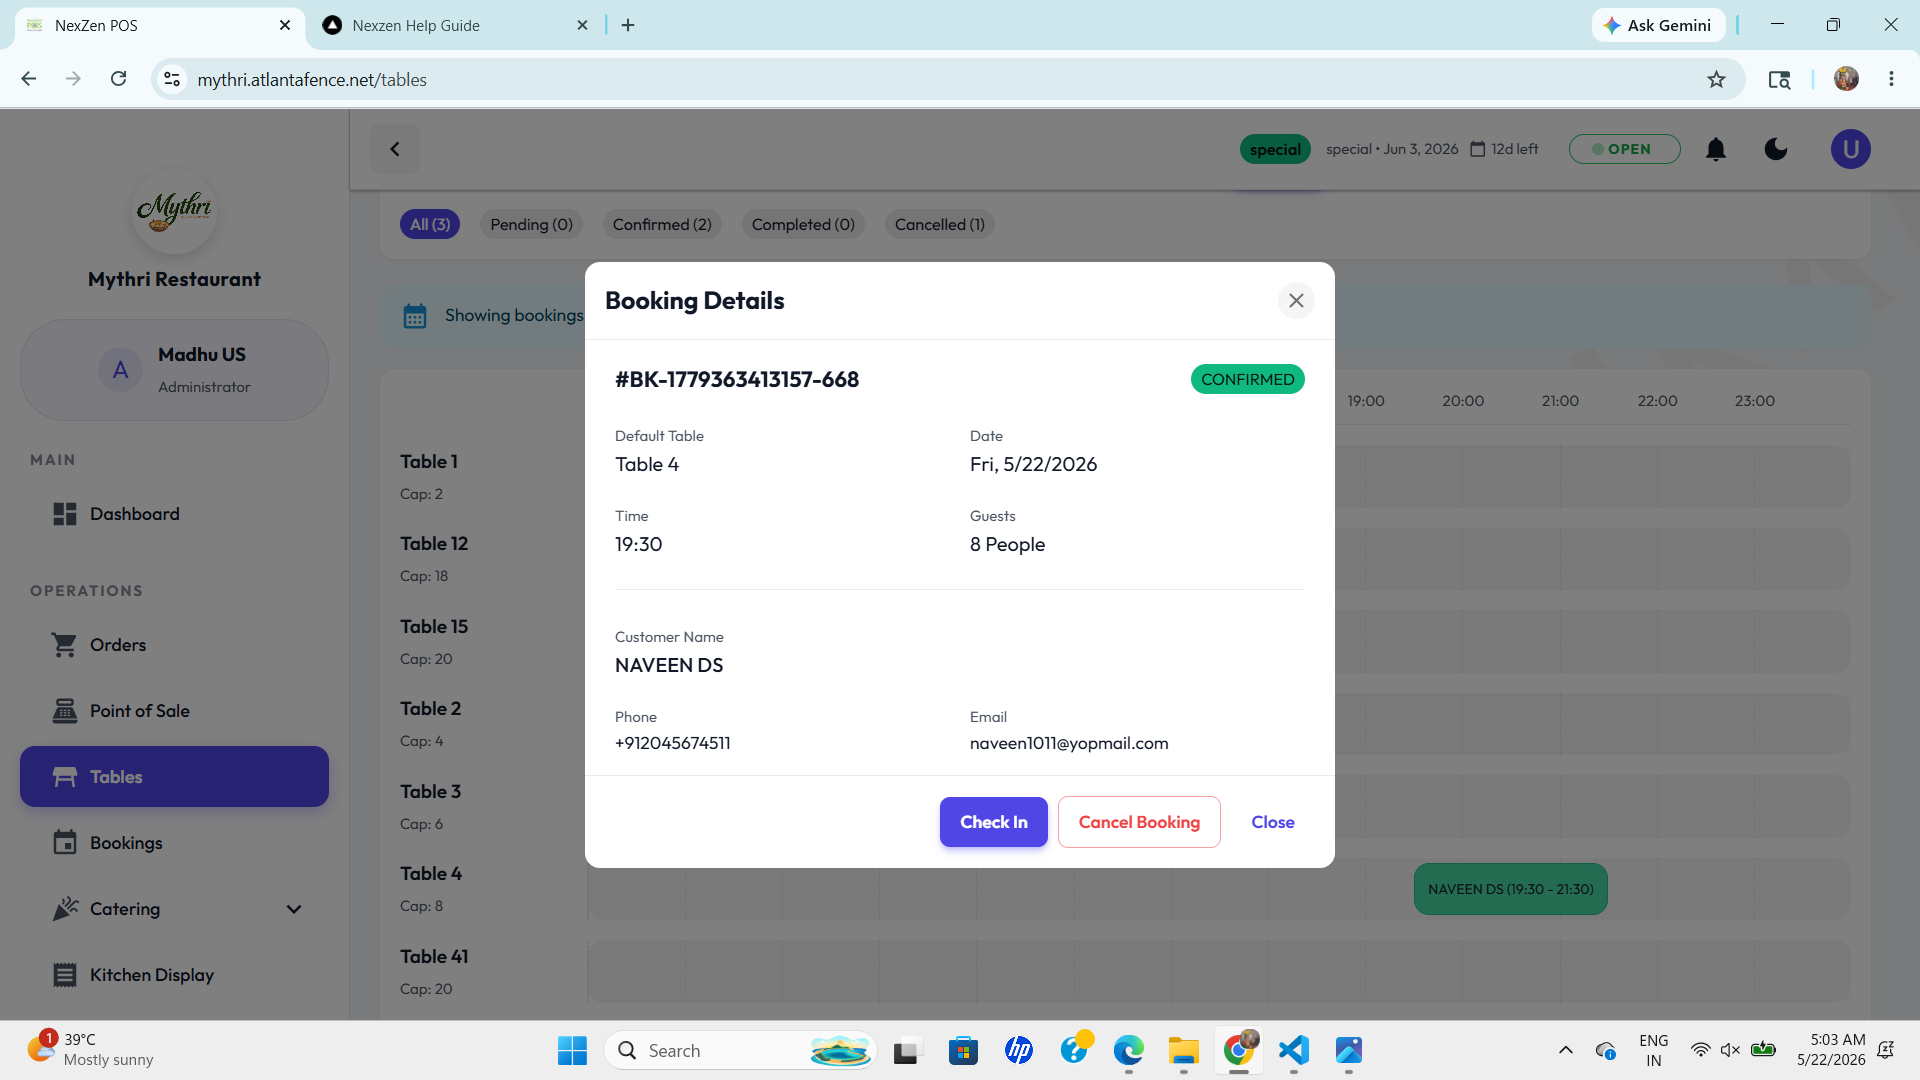
- Booking Summary: See the booking reference number, assigned table, date, time, guest count, and customer contact details.
- Status Badge: A green Confirmed badge appears on confirmed bookings so staff can immediately recognize the reservation state.
- Reservation Actions: Use the buttons at the bottom of the modal to Check In, Cancel Booking, or simply Close the detail view.
- Immediate Feedback: If the booking is canceled, it is removed from the timeline and the table becomes available again.
The modal is designed for fast desk work: confirm guest arrival with Check In, or cancel the reservation when plans change.
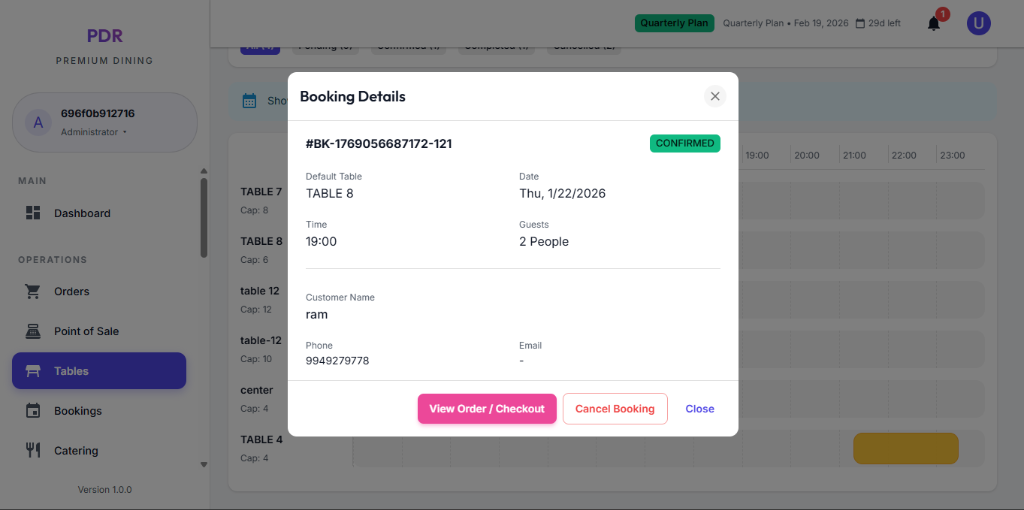
- Check In: Mark the party as arrived and jump directly to the POS section with the table pre-selected for ordering.
- Cancel Booking: Release the reservation and free the table for other guests.
- Close: Exit the modal without making any changes.